SqueezePlug
From SqueezeboxWiki
SqueezePlug stands for "SqueezeBox-Server on a PlugComputer!" A PlugComputer is a very small server, perfect for hosting your Squeezebox Server. I did a lot of research to find the optimum system and I'm sure that a PlugComputer is the best compact solution for hosting Squeezebox Server. All PlugComputers I support are fitted with an 1,2 GHz ARM-processor.
Main advantages
- enough performance for your SqueezeBox-Server and all standard plugins
- extremely low power consumption, only 3-5 Watt including 2.5 inch HDD via USB so you can leave it "always on"
- it's cheap, the plug costs less than 100$
- plug and forget system
- very easy to install if you use one of my images and follow this Wiki
- very flexible due to multiple ways of connecting your music library (USB-Drives, NAS, Network-Shares ...)
- very easy to use, maintain and update
- it's absolutely noiseless and has no moving parts, apart from external USB HDDs
- it's very small
- all software used in this project is absolutely free
- the system is open, you can modify it as you like
- ... and a lot more
SqueezePlug --Simple Systems Needs Simple Solutions
This project was formerly called "SqueezeBox-Server for dummies".
- Please visit my blog here SqueezePlug Blog and you will find everything you need!
- You don't have to be a Linux expert. Following this guide will provide you with your own SqueezeBox-Server (SBS), with no prior Linux know-how necessary.
- It's very important that you type all commands exactly as described in the Wiki. Please remember that all commands in Linux are case-sensitive.
If you find some faults or improvements, please let me know so that I can change the Wiki, or change it by your self.
Prerequisites
- One of these Plug Computers: SheevaPlug, TonidoPlug, Seagate DockStar, Seagate GoFlex Net, or Oracle VM VirtualBox to run a VM.
- for SheevaPlug: SD-Card (minimum 4GB as fast as possible)
- for the other Plugs: USB-Stick SD-Card (minimum 4GB as fast as possible)
- USB drive, NAS or other file-share for storing the music
- Putty or a similar terminal-program
- Working Internet connection for the SqueezePlug
- optional but recommended: DHCP server from which the SqueezePlug gets its IP-address after starting for the first time
Choose installation method
- This Wiki is constructed in modules. The steps you must follow depend on which installation method you choose and your personal environment, so be careful to follow the links which match your exact environment.
- There are seven installation methods to choose from
1. SqueezePlug_Sheeva_Image (SP_SI) SqueezePlug-Server for SheevaPlug as SD-Card Image
a. For Multi-Boot SheevaPlugs from NewIT
b. For all other SheevaPlugs
2. SqueezePlug_Sheeva_Installer (SP_SInst) SqueezePlug-Server for SheevaPlug for ESIA-Installer
3. SqueezePlug_Tonido_Image (SP_TI) SqueezePlug-Server for TonidoPlug as USB-Stick Image
4. SqueezePlug_DockStar_Image (SP_DI) SqueezePlug-Server for Seagate DockStar as USB-Stick Image
5. SqueezePlug_GoFlexNet_Image (SP_GI) SqueezePlug-Server for Seagate GoFlex Net as USB-Stick Image
6. SqueezePlug_VM (SP_VM) SqueezePlug-Server as a virtual machine
7. SqueezePlug_Sheeva_Manual (SP_SM) SqueezePlug-Server manual installation
- 1. SqueezePlug_Sheeva_Image
Pre Installed SqueezePlug including scripts for customization and installation of SBS. If you own a Plug from NewIT (Multi Boot or UBIFS) you don’t have to change anything with the Plug itself. The SqueezePlug_Sheeva_Image image comes as a 4GB image, because most of you use such cards, and it has enough space for everything you need. Choose this version if you want to keep the installation process as easy as possible. This method is the best for people with either very limited, or perhaps no Linux know-how. This method is also very quick, you only need a few steps to run it and don't have to read the complete Wiki.
The process differs depending on which Plug you own. If you own a NewIT Multi-Boot Plug you should definitely choose this method. If you own an other SheevaPlug like the normal developer version you can choose between this method and the SqueezePlug_Sheeva_Installer method. The result will be the same, you will get an SqueezePlug-Server.
- Next Step for SqueezePlug_Sheeva_Image (Multi-Boot Plug from NewIT) #Prepare the SD-Card / USB-Stick
- Next Step for SqueezePlug_Sheeva_Image (other SheevaPlugs) #Prepare the SD-Card / USB-Stick
- 2. SqueezePlug_Sheeva_Installer
SqueezePlug for SheevaPlug for ESIA-Installer. With this Version you will install SqueezePlug-Serer to any SheevaPlug by an easy, no cryptic way from your Windows PC without any Linux know how necessary. Choose this method to install SqueezeBox-Server on any SheevaPlug except the multi-boot option from NewIT. For this kind of SheevaPlug choose the SqueezePlug_Sheeva_Image version, because it's the easiest way for these plugs. Alternatively you can choose the SqueezePlug-Sheeva_Manual method to go all way by your own.
- Next Step for SqueezePlug_Sheeva_Installer #Establishing a Serial-connection
- 3. SqueezePlug_Tonido_Image
This is a USB-Image with SqueezePlug for the TonidoPlug. Choose this version if you own a TonidoPlug and you like to run SqueezeBox-Server on it. You can use you Tonido-Software as you are used to.
- Next Step for SqueezePlug_Tonido_Image #SqueezePlug_Tonido_Image
- 4. SqueezePlug_DockStar_Image
Use this version for the Segate DockStar devices. The Seagate Dockstar device is probably the cheapest device to run a SqueezeBox-Server. It has less features as a Sheevaplug but it offers the same hardware architecture. I was very sceptic if this device will offer enough performance for a SBS, but it does! Installing is very easy, I offer an image on usb-stick and have only to follow my instructions.
- Next Step for SqueezePlug_Dockstar_Image #SqueezePlug_Dockstar_Image
- 5. SqueezePlug_GoFlexNet_Image
Use this version for the Seagate GoFlex Net devices. The Seagate GoFlex Net device is very similar to the DockStar devices but offers two eSata slots for external HDs. Installing is very easy, I offer an image on usb-stick and have only to follow my instructions.
- Next Step for SqueezePlug_GoFlexNet_Image #Prepare the SD-Card / USB-Stick
- 6. SqueezePlug_VM
If you are not sure whether a SheevaPlug will be good enough as your SqueezeBox-Server, you can download a virtual SqueezePlug (SqueezePlug_VM). The setup works exactly the same way as for a Hardware SheevaPlug. So, you even are able to test whether you have enough knowledge to get it all to work! And you will see that you don’t need any special knowledge. If you like, you can run SqueezePlug_VM as your SqueezeBox-Server as well, but you have to keep in mind that running it on a "normal" PC the Power-Consumption would be much higher than with a hardware SqueezePlug. The performance of SqueezePlug_VM normally is a little bit faster than from the SqueezePlug. But you will only feel it when scanning the music-library. The performance in normal operating is quite the same.
- Next Step for SqueezePlug_VM #SqueezePlug_VM
- 7. SqueezePlug_Sheeva_Manual
Install it all by yourself using this Wiki. This method is based on the method of Martin Michlmayr. It's for people with good Linux know how, which like to see how it all works. Don't use this if you are no Linux expert.
- Next Step for SqueezePlug_Sheeva_Manual #Establishing a Serial-connection
- Install Matrix
This matrix describes which steps you have to follow, depending on the installation method you choose.
| No. | Installation Step | SP_SI (MB) | SP_SI | SP_SInst | SP_TI | SP_DI | SP_GI | SP_VM | SP_SM |
|---|---|---|---|---|---|---|---|---|---|
| 4 | #Choose installation method | x | x | x | x | x | x | x | x |
| 5 | #Prepare the SD-Card / USB-Stick | x | x | x | x | x | |||
| 6 | #Establishing an IP-connection | x | x | x | x | x | x | x | |
| 7 | #Establishing a Serial-connection | (x) | x | x | |||||
| 8 | #Fix SD-Card Bug | (x) | |||||||
| 9 | #Check U-Boot Version | x | x | ||||||
| 10 | #Update U-Boot | x | x | ||||||
| 11 | #Configure U-Boot for SqueezePlug_Sheeva_Image | x | |||||||
| 12 | #SqueezePlug_Sheeva_Installer | x | |||||||
| 13 | #SqueezePlug_Tonido_Image | x | |||||||
| 14 | #SqueezePlug_Dockstar_Image | x | |||||||
| 15 | #SqueezePlug_GoFlexNet_Image | x | |||||||
| 16 | #SqueezePlug_VM | x | |||||||
| 17 | #Start the SqueezePlug Script | x | x | x | x | x | x | x | x |
| 18 | #SqueezePlug_Sheeva_Manual | x | |||||||
| 19 | #Customize SqueezeBox-Server | x | x | x | x | x | x | x | x |
| 20 | #Update SqueezeBox-Server | x | x | x | x | x | x | x | x |
Prepare the SD-Card / USB-Stick
The quickest way to get your SqueezePlug up and running is to use one of my images. They are built for people who have either very little or even no knowledge in Linux and don’t want to spend a lot of time doing all the steps on their own.
Please note that SD-cards or USB-sicks may differ in size, even if they are labelled as 4 GB. The newest version of the USB Image Tool has a very cool feature: you can copy larger images to smaller SD-Cards or USB-sticks. For that reason I've setup the SD-card / USB-stick I took the image from with a partition smaller than the maximum size the SD-card / USB-stick offers. So you can now use the image for nearly every SD-card / USB-stick.
Images are made with the USB Image Tool for Windows systems. You can download it here: USB Image Tool. Make sure you use the newest version because it solves the problem with SD-cards / USB-sticks differing in size as mentioned above. You can also use Linux and the "dd" command to create SD-cards or USB-sticks.
- Install this tool on your Windows-system.
- Download the image from my site: SqueezePlug
- After downloading an image, unpack it to your PC.
- Start the USB Image Tool (as administrator in Window Vista or 7) and configure it via the "options" tab as shown in the screenshot below
- Be sure to set the tool to “device mode”, not to “volume mode”
- Write the *.img file to your SD-card / USB-stick by clicking the "restore"-button. Select the image file and hit "OK".
- You can also use larger SD-cards / USB-sticks and expand the system partition later using "gparted" or another tool for expanding partitions.
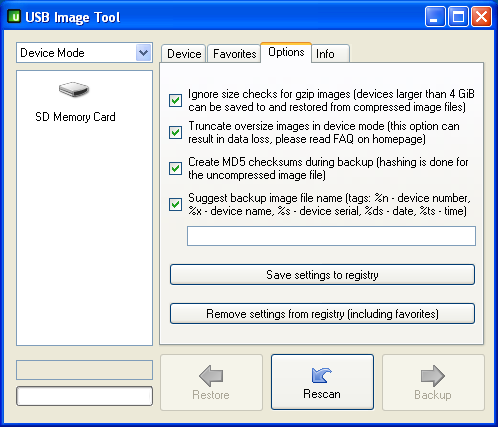
- USB Image Tool Settings
- Next Step for SqueezePlug_Sheeva_Image (Multi-Boot Plug from NewIT) #Establishing an IP-connection
- Next Step for SqueezePlug_Sheeva_Image (other SheevaPlugs) #Establishing a Serial-connection
- Next Step for SqueezePlug_Tonido_Image #Establishing an IP-connection
- Next Step for SqueezePlug_Dockstar_Image #SqueezePlug_Dockstar_Image
- Next Step for SqueezePlug_GoFlexNet_Image #SqueezePlug_GoFlexNet_Image
Establishing an IP-connection
An IP-connection is only possible if your Plug already has got an IP-Address by DHCP (Dynamic Host Configuration Protocol) or you have setup the IP-settings of the Plug manually. The following devices are ready to connect via an IP-connection by default:
- SheevaPlug (MultiBoot Option started with a SqueezePlug Image)
- TonidoPlug (started with a SqueezePlug Image)
- DockStar
- Goflex Net
So if you own one of the devices from above just find out the IP-address and connect via SSH e.g. with putty. Normally you do that from your router and there search for DHCP-information.
If you have to change the settings of the bootloader (u-boot) to boot with an SqueezePlug image you can't do this from an IP-connection. This only works from a serial-connection. So with the SheevaPlug Developer Kit, the normal way is to first connect to the Plug by a serial-connection, configure it and later when everything is setup connect via IP. You then only need the serial-connection if something goes wrong with you plug.
After booting try to connect to the plug via IP. If a DHCP-server is running, you have to know the IP-address the DHCP-server has assigned to your Plug. One way to look it up is in the router's GUI. If that doesn't work or you don't know how to find it, there are two other ways you can try:
1. Try to ping the netbios name of the SqueezePlug (do it from a DOS-Box of your Windows PC)
ping squeezeplug
If you get an IP-address reported back, you can use this or use the netbios name with a terminal connection using putty (or any other terminal program).
2. If that doesn't work, try to give the SqueezePlug a temporary IP-address.
- Discover a free IP-address form your subnet. Be sure that this IP-address is not used by any other network device by trying a ping to that address. If the ping reports error-messages stating the address specified does not answer you can be sure that this address is free.
- Look up the MAC-address of your SheevaPlug (printed on the back-side of your Plug and looking like this: 00:50:43:xx:xx:xx)
- Open a DOS-Box an type:
arp -s IP-address MAC-address
- Check whether this works by pinging the IP-address
ping IP-address
- Now you should be able to connect to the SqueezePlug via a putty SSH-session using this IP-address.
- If that all doesn't work, you have to make a serial (USB) connection.
- Only for SheevaPlugs
- Sometimes the reason you can't connect via IP is that your SD-card is not recognized at boot-time, so you have to change the boot-environment. In that case you'll have to establish a serial connection as well, goto #Establishing a Serial-Connection.
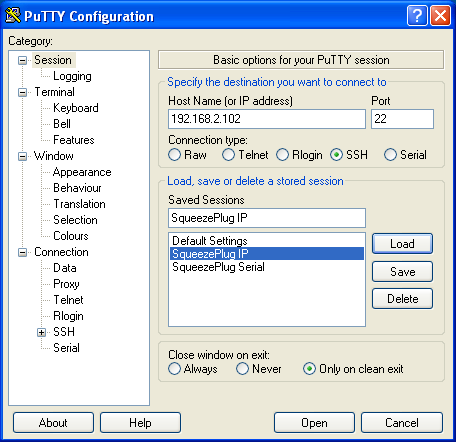
- Settings for a putty IP-connection
- Next Step for SqueezePlug_Sheeva_Image (Multi-Boot Plug from NewIT) if the IP-connection doesn't work #Establishing a Serial-Connection
- Next Step for SqueezePlug_Sheeva_Image if the IP-connection works #Start the SqueezePlug Script
- Next Step for SqueezePlug_GoFleNet_Image #SqueezePlug_GoFlexNet_Image
Establishing a Serial-connection
A serial connection to the plug is very important for various reasons. You should be prepared to have such a connection, because you can't do everything with the Plug from an IP-connection or if you don't have an IP-connection. The first thing you need to do on Windows is to install the FTDI 2232 driver that supports the Plug Computer mini-USB to serial connection. First, you need to be prepared to install three different drivers to get the serial terminal to work.
- Installing the Windows Driver
Look in WindowsTeraTermUSBDriver.zip on the CD that came with your plug or download it. This driver is meant for Microsoft Windows XP (but may work elsewhere). You can download the latest driver here: serialdriver The first driver install is to recognize the FTDI connection on the other end of the mini-USB cable. The second and third drivers are installed to convert the FTDI 2232 controllers to serial terminals.
- Extract the archive to an directory on your PC. You will only need the directory "CDM 2.04.16_SHEEVA"
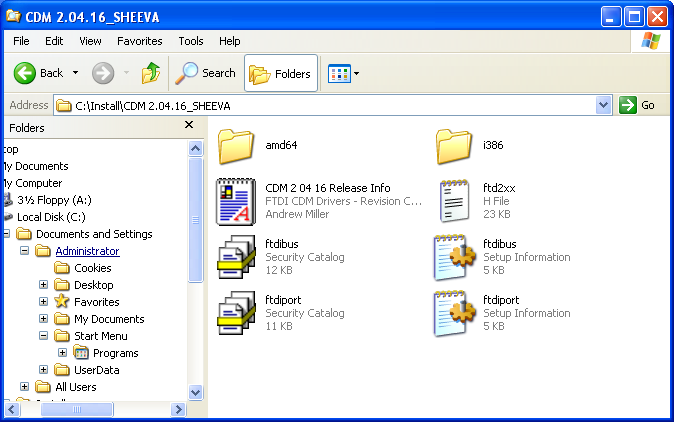
- Choose a path you like, I choose c:/install/
- Plug in the USB-Connection between you PC and the SheevaPlug
- Power on the SheevaPlug
- Your PC will recognize the SheevaPlug
- The New Hardware Wizard starts
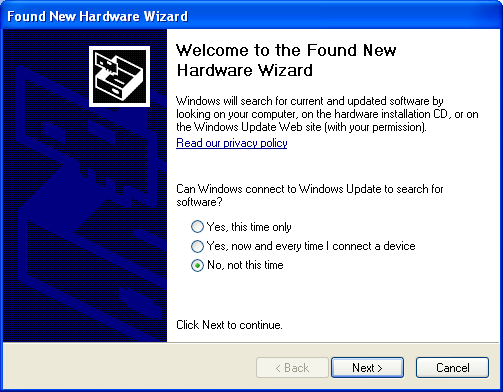
- Don't search for updates
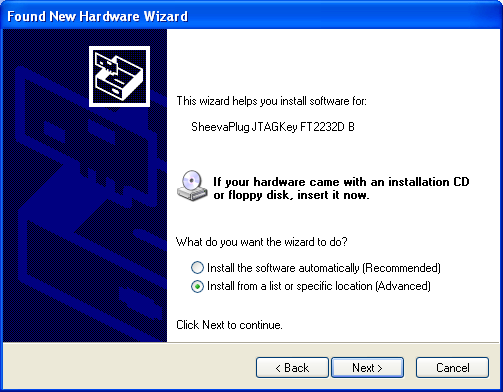
- Choose "Install from a list or from a specific location"
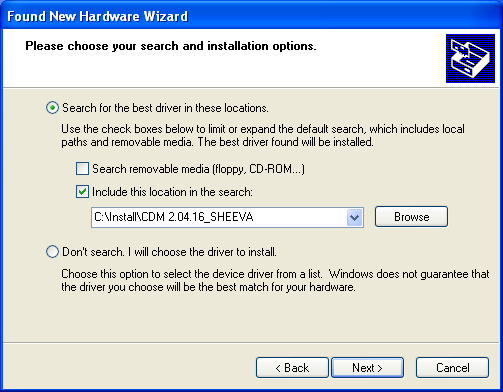
- Point the path to your installation directory
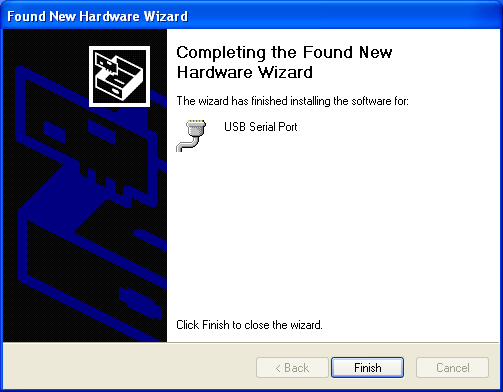
- Do this for the three different drivers: "USB Serial Converter A", "USB Serial Converter B" and " USB Serial Port", till you get this screen:
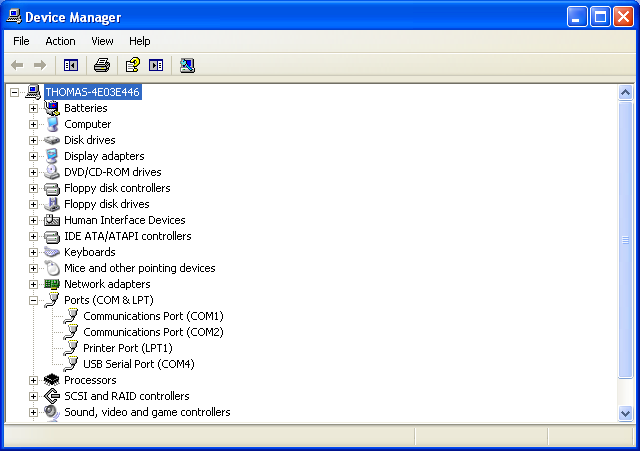
- After the installation is finished, you have to figure out which COM-Port is mapped. For that go to control panel/system/device manager open the device-mananger and find the USB Serial Port. In order to find the COM port to use, and look in the Ports section. Sheeva is listed as USB serial port and after it between brackets is the name of the COM port (e.g. COM4 or COM24).
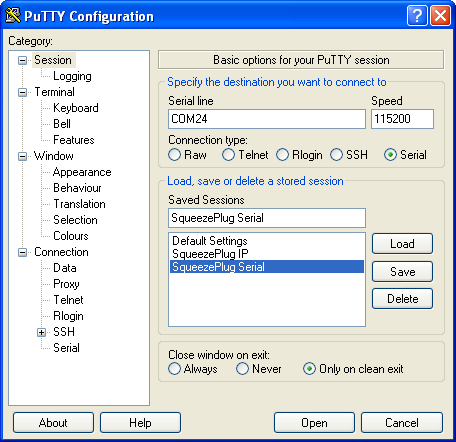
- Settings for a Putty Serial-Connection
Now you are ready to establish a putty connection.
- If not already done, download putty from here: Putty
- Baudrate to use is 115200 (8N1). If you get problems when you try to interrupt the boot-process because the plug doesn't accept your Any-Key, then try to set the Handshake for the serial connection to NONE.
- Next Step for SqueezePlug_Sheeva_Image (Multi-Boot Plug from NewIT) #Fix SD-Card Bug
- Next Step for SqueezePlug_Sheeva_Image (other SheevaPlugs) #Check U-Boot Version
- Next Step for SqueezePlug_Sheeva_Installer #SqueezePlug_Sheeva_Installer
- Next Step for SqueezePlug_Sheeva_Manual #Check U-Boot Version
Fix SD-Card Bug
The reason why an IP-Connection to the Plug failed may be because your sd-card doesn't work properly. Some sd-cards are not recognized at boot-time with the standard environment variables, so you have to change the boot-environment. In that case you have to change the bootcmd_mmc variable to initialize the sd-card twice as a workaround.
- Form the marvel prompt type:
Marvell>> setenv 'bootcmd_mmc=setenv bootargs $(bootargs_console) $(bootargs_root_mmc); mmcinit; mmcinit; ext2load mmc 0:1 0x800000 /uImage; bootm  0x00800000'
saveenv
reset
- Check whether the card is recognized at boot-time now. If not, try another card.
- Next Step for SqueezePlug_Sheeva_Image (Multi-Boot Plug from NewIT) #Start the SqueezePlug Script
Check U-Boot Version
If you own a SheevaPlug like the original factory set Sheeva Dev Kit you have to check your u-boot version (the boot system of your SheevaPlug) and perhaps update it and change some u-boot environment variables as described in this Wiki. This can only be done via serial connection.
- establish a serial (USB) Connection to your SheevaPlug.
- interrupt the booting-process by hitting <return> several times. If you are not quick enough, boot the linux-system from NAND and shut it down afterwards by typing:
login as: root
pw: nosoup4u
shutdown –r now
- Interrupt the booting-process again by hitting <return> several times.
- Check your version of the u-boot environment:
Marvell>> version
- If you're running a version of u-boot older than 3.4.19 you have to update u-boot before proceeding with the next steps!
This can be accomplished in two different ways. Either you use a USB stick (recommended) or do it with the "TFTP-method" if you don't have a USB stick at hand.
- Next Step for SqueezePlug_Sheeva_Image (other SheevaPlugs) with u-boot older than 3.4.19 #Update U-Boot
- Next Step for SqueezePlug_Sheeva_Manual with u-boot older than 3.4.19 #Update U-Boot
- Next Step for SqueezePlug_Sheeva_Manual #Update U-Boot
Update U-Boot
First of all, get the updated uboot version. You can download version 3.4.27 here: U-Boot 3.4.27
- USB stick method
For this method you need an USB stick formatted with FAT or FAT32 filesystem. Apart from that any stick will work as we need less than 1 MB of free space on it.
- Download the uboot.bin file as described above and copy it to your USB stick.
- Plug the stick in your SheevaPlug.
- Establish a serial connection to your plug if you haven't done so already and type the following commands (copy and paste will also work):
Marvell>> usb start
Marvell>> fatload usb 0:1 0x0800000 uboot.bin
Marvell>> nand erase 0x0 0xa0000
Marvell>> nand write 0x0800000 0x0 0xa0000
Reboot your plug by typing the following command:
Marvell>> reset
- TFTP method
For updating the uboot version via this method you need TFTP software. I recommend using Tftpd32 which you can find here: TFTP Server.
Be sure to set "TFTP Security" to "none".

- TFTP security settings
- Install the TFTP-Server
- Download the U-Boot file
- Copy the file uboot.bin to your TFTP server directory.
- Start your SheevaPlug, connect the serial console and type the following commands:
Marvell>> setenv serverip 192.168.1.2 # IP of your TFTP server
Marvell>> setenv ipaddr 192.168.1.200 # IP-address of your SheevaPlug
Marvell>> bubt uboot.bin
The upgrade process will ask whether you want to change the environment:
Override Env parameters? (y/n) n
Make sure to answer "n" here.
After that reboot your plug by typing the following command:
Marvell>> reset
Regardless of the method used you can verify that the new version is installed correctly as described at the start of this section.
If you need more information on updating U-Boot read here: update u-boot
- Next Step for SqueezePlug_Sheeva_Image (other SheevaPlugs) #Configure U-Boot for SqueezePlug_Sheeva_Image
- Next Step for SqueezePlug_Sheeva_Manual #SqueezePlug_Sheeva_Manual
Configure U-Boot for SqueezePlug_Sheeva_Image
The following settings only apply for SheevaPlug models which are not setup as multi-boot Plugs and without the UBIFS-Filesystem installed on the NAND. Therefore these setting apply for Plugs with a JFFS-Filesystem installed on the NAND only. The Basic SheevaPlug is coming with this setup for example.
- First, save your environment settings by typing in the serial console (Putty):
Marvell>> printenv
You now get output with all your environment settings.
- You should copy this to the clipboard by right-clicking the top bar of your putty window and choosing "Copy all to clipboard" then paste this in a txt-file and save it.
- From the serial console (Putty) type these commands, one after the other, and confirm after every line by hitting <return>. Copy each line to the clipboard (<ctrl> + <c>) and paste this in the Putty window by clicking the right mouse button.
- SD-Boot only
With these settings the plug will only boot from the SD-Card, not from the NAND:
- Please note that you have to set the value of the ethaddr variable to the MAC-Address of your Plug (look it up from the backside of the Plug).
Marvell>> setenv arcNumber 2097
Marvell>> setenv bootargs_console console=ttyS0,115200
Marvell>> setenv bootargs_root root=/dev/mmcblk0p2 rootdelay=5
Marvell>> setenv bootcmd 'setenv bootargs $(bootargs_console) $(bootargs_root); mmcinit; mmcinit; ext2load mmc 0:1 0x800000 /uImage; bootm 0x00800000'
Marvell>> setenv ethaddr 00:50:43:xx:xx:xx
Marvell>> setenv filesize 32D62A
Marvell>> setenv mainlineLinux yes
Marvell>> setenv real_bootcmd 'setenv bootargs $(bootargs_console) $(bootargs_root); mmcinit; mmcinit; ext2load mmc 0:1 0x800000 /uImage; bootm 0x00800000'
Marvell>> saveenv
- If you like to restore the original settings to boot from NAND do this:
setenv bootargs 'console=ttyS0,115200 mtdparts=nand_mtd:0x400000@0x100000(uImage),0x1fb00000@0x500000(rootfs) rw root=/dev/mtdblock1 rw ip=10.4.50.4:10.4.50.5:10.4.50.5:255.255.255.0:DB88FXX81:eth0:none'
setenv bootargs_root root=/dev/mtdblock2 ro
setenv bootcmd nand read.e 0x800000 0x100000 0x400000; bootm 0x800000
setenv cesvcid ULULULULULULPPULULULULULDA
setenv console console=ttyS0,115200
setenv mainlineLinux no
setenv run_diag no
saveenv
- Select boot
- If you like your system being able to choose between booting from NAND or from SD-Card you can do the following:
setenv bootargs_root_factory root=/dev/mtdblock2 ro
setenv mtdpartitions_factory mtdparts=nand_mtd:0x400000@0x100000(uImage),0x1fb00000@0x500000(rootfs) rw root=/dev/mtdblock1 rw
setenv prepare_factory_settings 'setenv arcNumber;setenv mainlineLinux no; setenv run_diag no;setenv console console=ttyS0,115200;setenv cesvcid ULULULULULULPPULULULULULDA;'
setenv bootcmd_factory 'run prepare_factory_settings;setenv bootargs $(bootargs_console) $(mtdpartitions_factory);nand read.e 0x800000 0x100000 0x400000; bootm 0x800000'
setenv prepare_mmc_settings 'setenv mainlineLinux yes;setenv arcNumber 2097;setenv run_diag;'
setenv bootargs_root_mmc root=/dev/mmcblk0p2 rootdelay=5
setenv bootcmd_mmc 'run prepare_mmc_settings;setenv bootargs $(bootargs_console) $(bootargs_root_mmc); mmcinit; mmcinit; ext2load mmc 0:1 0x800000 /uImage; bootm 0x00800000'
- To boot from SD-Card do the following
run prepare_mmc_settings
saveenv
reset
run bootcmd_mmc
- To boot from NAND do the following
run prepare_factory_settings
saveenv
reset
run bootcmd_factory
- Next Step for SqueezePlug_Sheeva_Image (other SheevaPlugs) #Start the SqueezePlug Script
SqueezePlug_Sheeva_Installer
Description: SqueezePlug-Server for SheevaPlug for ESIA-Installer
Short name: SP_SInst
Who should use this version? Use if your SheevaPlug do not allow booting Debian from SD-Card
Summary: With the SqueezePlug-Server for SheevaPlug Version you will install SqueezePlug-Serer to any SheevaPlug by an easy, no cryptic way from your Windows PC without any Linux know how necessary. Choose this method to install SqueezeBox-Server on any SheevaPlug except the multi-boot option from NewIT. For this kind of SheevaPlug choose the SqueezePlug_Sheeva_Image version, because it's the easiest way for these plugs. Alternatively you can choose the SqueezePlug-Sheeva_Manual method to go all way by your own.
What do you need?
- Putty: Putty
- ESIA: ESIA/
- SqueezePlug_Sheeva_Installer Package from: SqueezePlug.de
- A fresh version of the bootloader u-boot. Get it from my site: SqueezePlug.de
- Serial USB-Cable for the SheevaPlug
- min. 1GB USB Stick
- min. 4GB SD-Card
- SD-Card formatter: SD-Card formatter
Installation process
- Download the SqueezePlug_Sheeva_Installer Package from: SqueezePlug.de
- Format the USB-Stick as FAT32
- Extract the files to the USB-Stick on the subdirectory /squeezeplug_sheva_installer
- Download the ESIA Software from here ESIA: ESIA
- Install the ESIA Software
The installation is pretty much forward just click on "next" and on "install" and accept the licenses agreement.
- After the installation copy a fresh u-boot version from my site SqueezePlug.de to the ESIA Program folder C:\Program Files\ESIA\uboot
- Plug in the USB Stick to your PC you run ESIA on
- Plug in the SD-Card to the SheevaPlug
- Connect the USB-Serial Cable between your PC and the SheevaPlug
- Power on the SheevaPlug
- Start the ESIA Installer
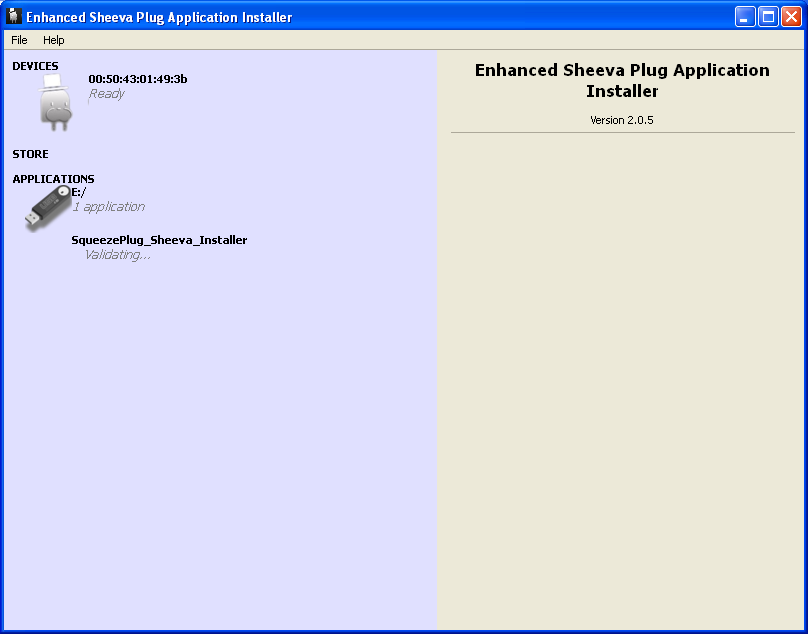
- See whether the SheevaPlug is recognized by ESIA under devices. You should see you MAC-Address under devices.
- If not, disconnect the SheevaPlug from power
- Power on the SheevaPlug again
- See whether the SheevaPlug is recognized by ESIA now
- If not, start putty
- Establish a serial (usb) connection to putty
- See in which state the plug is. If an OS is started login with "root" and PW: "nosoup4u" an the type:
shutdown -r now
- After rebooting of the plug hit return several times to interrupt the boot process.
- After the boot process is interrupted, close putty.
- Start ESIA again and see whether the SheevaPlug is recognized by ESIA now
- If yes you can start the installation process. If not, try once more.
- Point your application path to you USB stick
- ESIA should recognize the stick and verify it.
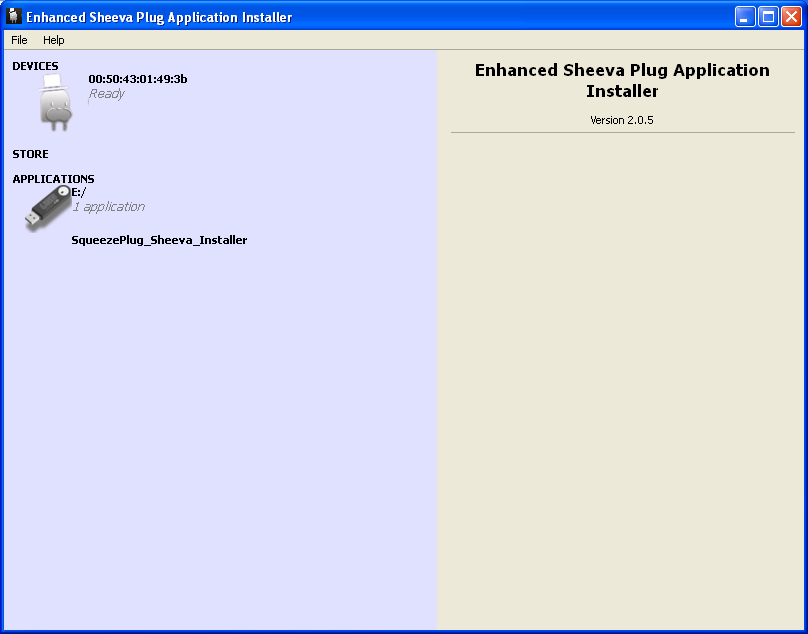
- Click on SqueezePlug_Sheeva_Installer
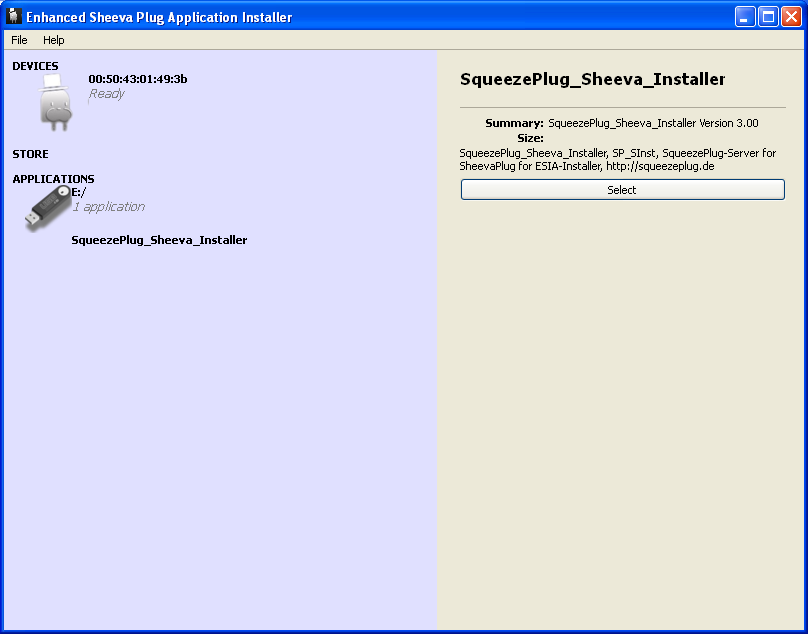
- Click on "select"
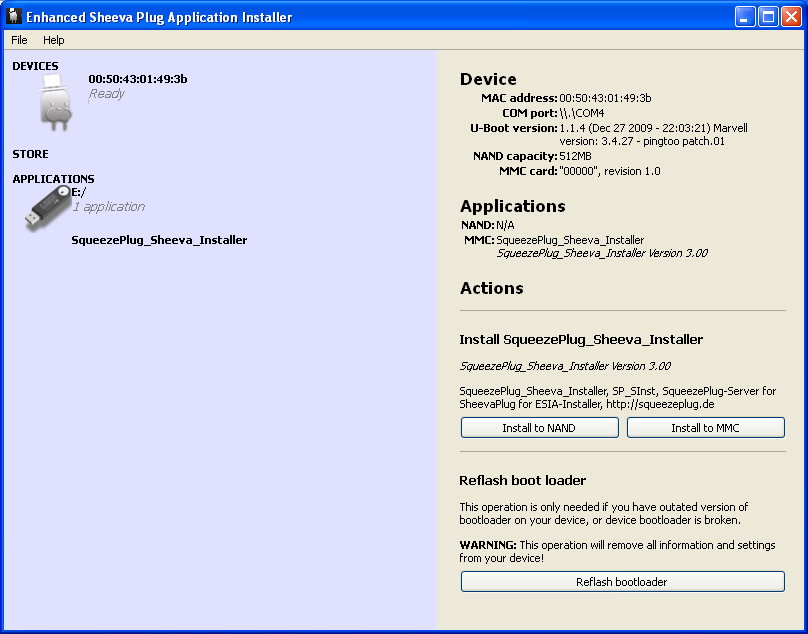
- Check your u-boot version. If you're running a version of u-boot older than 3.4.19 you have to update u-boot before proceeding with the next steps
- Click on "Refresh bootloader". This operation will last a little while. After it your Plug has a fresh bootloader.
- Click on "Install on MMC"
Some files are copied from your PC to the USB-Stick and you will get the following message when this is finished:
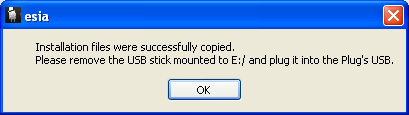
- Remove the USB-Stick from the PC and plug it in the SheevaPlug. Be careful that you don't remove the USV-Cable between you PV and you SheevaPlug

- Choose "Boot from MMC Card"
- Click "Install"
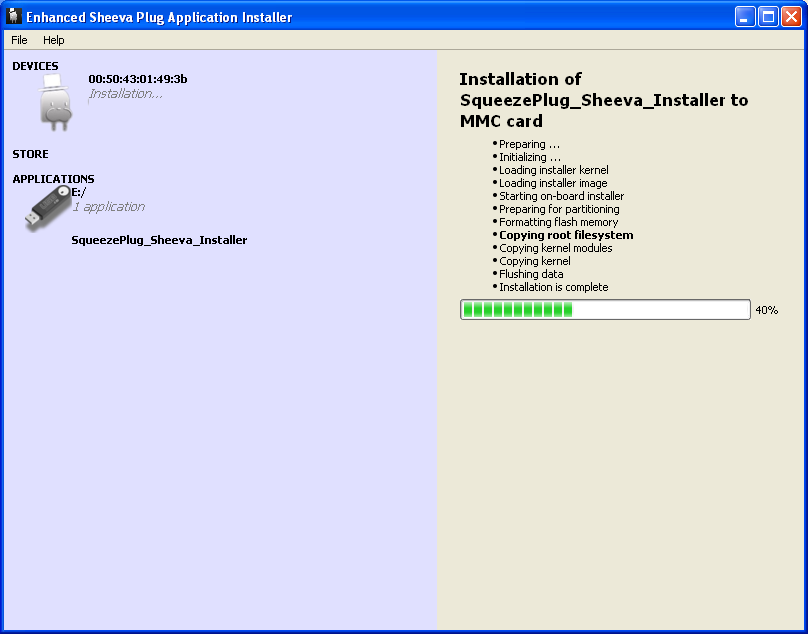
The installation Process starts and last some time.
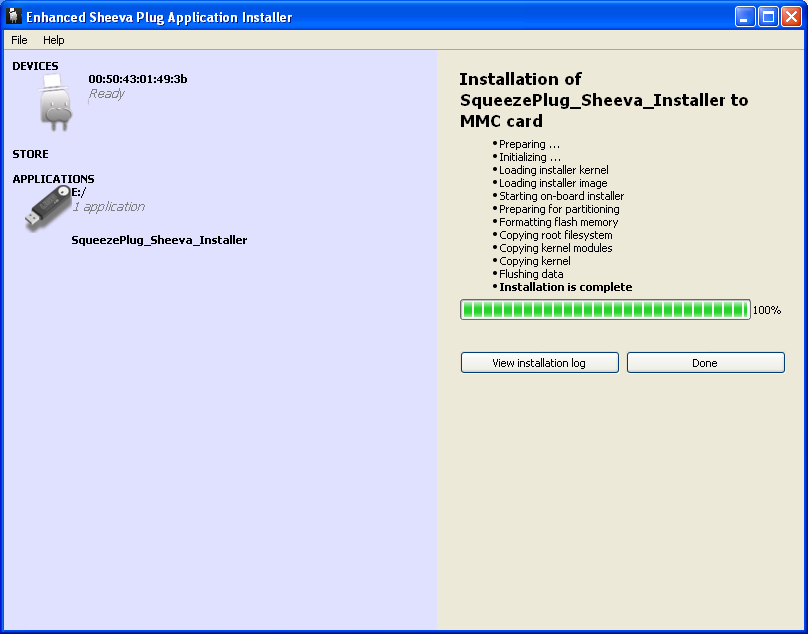
After the process is finished, you should have a working SqueezePlug.
To be sure everything worked well we will check this:
- Finish the ESIA-Installer.
- Open a putty connection (serial USB)
- Type "reset" and press <return>
- Watch the boot process and see whether Debian boots an shows the squeezeplug prompt.
- Next Step for SqueezePlug_Sheeva_Installer #Start the SqueezePlug Script
SqueezePlug_Tonido_Image
Prerequisites:
For SqueezePlugTonido you will need:
- Tonidoplug (www.tonido.com)
- USB-stick 4GB (or more) or a usb harddrive, preferably partitioned with a 4GB boot partition
- self-powered USB drive (plus small usb switch, in case you use a usb stick to boot from), NAS or other file-share for storing the music
- Putty or a similar terminal-program
- Working Internet connection for the SqueezePlugTonido
- optional but recommended: DHCP server from which the SqueezePlugTonido gets its IP-address after starting for the first time
If you created a profile already on your Tonidoplug, you need to copy it to your computer so you can reuse it on your SqueezeplugTonido setup.
Make a backup of your profile folder (/root/app/tonido/approot/profiles), you can use samba or the winscp program on your PC (the profile folder is the folder with the name of your profile)
SqueezePlugTonido includes scripts for customization and installation of SBS. The SqueezePlugTonido image comes as a 4GB image, so if you use a 4GB usb stick or harddisk partition you don't need to resize the partition, and it has enough space for everything you need.
The Tonidoplug is designed to boot up from usb in the first place, if it can not find a suitable OS, it continues to boot from internal nand. Installing SqueezepugTonido is very quick, you only need a few steps to run it and don't have to read the complete Wiki. But doing so is recommended since you'll get a better understanding of the system.
Prepare the USB stick or partition.
Please note that usb-sticks may differ in size, even if they are labeled as 4 GB. The newest version of the USB Image Tool has a very cool feature: you can copy larger images to smaller SD-Cards. For that reason I've setup the card I took the image from with a partition smaller than the size the card offers. So you can now use the image for nearly every 4GB usb-stick.
Images are made with the USB Image Tool for windows systems. You can download it here: http://www.alexpage.de USB Image Tool. Make sure you use the newest version because it solves the problem with usb-sticks differing in size as mentioned above.
- Install this tool on your windows-system.
- After downloading the image, unpack it to your PC by clicking on the self extracting archive (do a virus-scan before you execute this file).
- Start the USB Image Tool (as administrator) and configure it via the Options tab
- Be sure to set the tool to “device mode”, not to “volume mode”
- Write the *.img file to your usb-stick or usb drive by clicking the "Restore"-button. Select the image file and hit "OK".
- You can also use larger cards and expand the system partition later using gparted or another tool for expanding partitions.
Establishing an IP-connection.
After you copied the image to the USB-stick, you can place it in the Tonidoplug and reboot the device. After booting try to connect to the plug via IP.
This option only works if you have a DHCP-server running on your network (normally the internet router) to provide an IP-address for your SqueezePlug.
If a DHCP-server is running, you have to know the IP-address the DHCP-server has assigned to your Plug. One way to look it up is in the router's GUI. If that doesn't work or you don't know how to find it, there are two other ways you can try:
1. Try to ping the netbios name of the SqueezePlug (do it from a DOS-Box of your Windows PC)
ping squeezeplug
If you get an IP-address reported back, you can use this or use the netbios name with a terminal connection using putty (or any other terminal program).
2. If that doesn't work, try to give the SqueezePlug a temporary IP-address.
- Discover a free IP-address form your subnet. Be sure that this IP-address is not used by any other network device by trying a ping to that address. If the ping reports error-messages stating the address specified does not answer you can be sure that this address is free.
- Look up the MAC-address of your SheevaPlug (printed on the back-side of your Plug and looking like this: 00:50:43:xx:xx:xx)
- Open a DOS-Box an type:
arp -s IP-address MAC-address
- Check whether this works by pinging the IP-address
ping IP-address
* Now you should be able to connect to the SqueezePlug via a putty SSH-session using this IP-address.
Start the SqueezePlug Script
You can do the final configuration quickly by just running the SqueezePlug Script. It configures your network settings, your filesharing connections and installs SBS automatically. If you don't wish to use this script you can also do all necessary configuration steps by hand.
- Logon to SqueezePlug:
login as: root
pw: nosoup4u
- First change your password, type:
- passwd and follow instructions
- On your running system, start the SqueezePlug Config Script by typing:
squeezeplug:~# setup
- At the first step of the script you should configure your plug by choosing "Configuration". After the configuration has finished, the plug reboots.
Now you have completed the setup. Remember that the Tonidoversion in this image is the embedded version. There are 2 main differences. Tonido admin is not available and usb disks are not automatically mounted. For this you can use the installed webmin package.
To be able to re-use your profile copy the profilefolder (the backup you made in the first steps of this wiki) to the new location: /usr/local/tonido/approot/profiles and reboot your device.
You also have to set a tonido user data directory, I created a folder named tonido_data in the rootfs structure for this.
- Next Step for SqueezePlug_Tonido_Image #Start the SqueezePlug Script
SqueezePlug_Dockstar_Image
This part of the Wiki describes how to setup a Seagate DockStar or a Pogoplug device as a SBS in some short steps. I hope to support the GoFlex Net soon!
When I talk about a "device" I mean a DockStar device. Most of the things will work on a PogoPlug too, but I can't give you a guarantee for that. I don't own such a device so I cant check this out.
Most of the steps to get the devices running Debian Squeeze are from Jeff Doozan: http://forum.doozan.com/index.php. Without his work, SqueezePlug on the Seagate devices would not be possible! So I want to thank Jeff for his great work!
The following devices will be supported:
- Seagate DockStar STDSD10G-RK (will not be continued)
- Pogoplug POGO-E02 (without guarantee)
- Seagate GoFlex Net Media Sharing Device STAK200 (not yet supported)
Prepare the USB-Stick
- Download my SqueezePlug_Dockstar_Image image for the USB-Stick
- "Burn" the file to your stick by the USB-Image-Tool (take a min 4GB-Stick)
- If you don't know how to do this, look it up here: #Prepare the SD-Card / USB-Stick
There are two different methods to get the devices working. With the first method you will register your device at seagate and you can use the pogoplug software, if you boot your device from the NAND and not from the USB-stick. With the second method you will not first register to the PogoPlug service. But if you like you can do it whenever you like. There are a lot of people who like the second method more than the first, but decide it by your self. Both methods are o.k.
First method, with registration
- Plug in the device to your network.
- Be sure you have a Internet connection for the device.
- Register your device at seagate: DockStar Registration.
- Enable SSH in the security settings of the PogoPlug Site.
- Get the IP-Address of the device from your router. (DHCP-Settings)
- Establish a connection to this IP by SSH via putty.
- If you don't know how to do this, look it up here: #Establishing a Serial-connection
- Login with root and the password you gave the device during the registration process.
Second method, without registration
- Look up the MAC-Address of your device. You will find it on the backside of the device.
- The MAC-Address looks something like this: 0010751AC010.
- Look at the last two octets: C0 and 10.
- Open a calculator (e.g. windows calc).
- Switch to the scientific mode.
- Switch to Hex.
- Type in the value C0.
- Switch to Dez.
- Write down the value 192.
- Switch to Hex.
- Type in the value 10.
- Switch to Dez.
- Write down the value 16.
- The first two octets are fix 169.254.
- So the IP-Address of your device is: 169.254.192.10.
- Disconnect your PC from the network.
- Connect the PC directly to the device.
- Give your PC an IP-Address out of the range 169.254.0.0 /16 (255.255.0.0). E.g.: 169.254.0.100.
- Ping the IP of the device:
ping 169.254.192.10
- If you get an answer connect to the device by SSH.
- Establish a connection to this IP by SSH via putty.
- If you don't know how to do this, look it up here: #Establishing a Serial-connection
- Login with root and the password stxadmin.
For both methodes go on with the next steps:
- Flash the new bootloader so that the DockStar will boot from a USB-Stick if you have one connected. During this process you will be asked whether to disable the PogoPlug-Service. Choose what you like!
-bash-3.2# cd /tmp
-bash-3.2# wget http://jeff.doozan.com/debian/uboot/install_uboot_mtd0.sh
-bash-3.2# chmod +x install_uboot_mtd0.sh
-bash-3.2# export PATH=$PATH:/usr/sbin:/sbin
-bash-3.2# ./install_uboot_mtd0.sh
- After flashing is finished, power off the device.
-bash-3.2# halt
- Wait 60 seconds.
- Put in the USB-Stick in one of the USB-Slots of the device.
- Power on the device.
- Your IP-Address may become different to the old one. So look it um from you DHCP-Server (Router)
- Connect to this IP-Address by Putty.
- Login with "root" and "nosoup4u".
- Check whether the prompt is:
squeezeplug:~#
- If not, boot once again
Hints:
If you plug in a external HD to Dockstar, you may get some trouble with your partition names. /dev/sda1 can sometime be /dev/sdb1. Because that, you will have trouble to mount your external drive and you wont get your music library connected. For that reason do the following:
- Get the name of your external drive:
squeezeplug:~# blkid
- You will something like this:
root@squeezeplug:/mnt/usb/music# blkid
/dev/sda1: LABEL="MOBILE_DISC" UUID="19EB-3228" TYPE="vfat"
/dev/sdb1: UUID="29e469e3-f30a-4ecf-bdeb-2fee0ede9c0c" TYPE="ext2"
/dev/sdb2: TYPE="swap"
- Copy the UUID of your external drive to the clipbord (eg. 19EB-3228).
- Edit your fstab file and replace /dev/sdb1 with the UUID-number:
squeezeplug:~# nano /etc/fstab
# For USB Fat/Fat32 drive edit the next line:
UUID=19EB-3228 /mnt/usb/music vfat rw,user,auto 0 0
- Mount again:
squeezeplug:~# mount -a
Now the external HD will be savely mounted to /mnt/usb/music.
Reenable PogoPlug-Service
If you like to reenable the Pogoplug service do this:
- Start your dockstar without a usb-stick.
- Make the system partition writable:
bash-3.2# mount -o remount,rw /
bash-3.2# vi /etc/init.d/rcS
- goto this line: #/etc/init.d/hbmgr.sh start
- delete the #
- save the file
- reboot
bash-3.2# halt
- Wait 60 seconds.
- Disconnect and reconnect power to the device
- Next Step for SqueezePlug_Dockstar_Image #Start the SqueezePlug Script
SqueezePlug_GoFlexNet_Image
This part of the Wiki describes how to setup a GoFlex Net device as a SBS in some short steps.
If you follow exact the steps of this Wiki you will get a device running SqueezePlug from a USB-stick. The original PogoPlug system will not work anymore, so be careful. After you do the next steps, you can't boot into the PogoPlug system any more. And there is no way back to the old system.
If you like a system on the internal NAND you can install a rescue system. That's a great system you can use for a lot of different things if something goes wrong with your USB-Stick.
The following device will be supported:
- Seagate GoFlex Net Media Sharing Device STAK200
- STAK100 should work either but I've not tested this.
Registration of your GoFlex Net
You should register your GoFlex Net even if you don't plan to use the device as a PogoPlug system. This ensures that you can activate SSH you will need to connect the device.
- Plug in the device to your network.
- Be sure you have a Internet connection for the device.
- Register your device at seagate: GoFlex Net Registration.
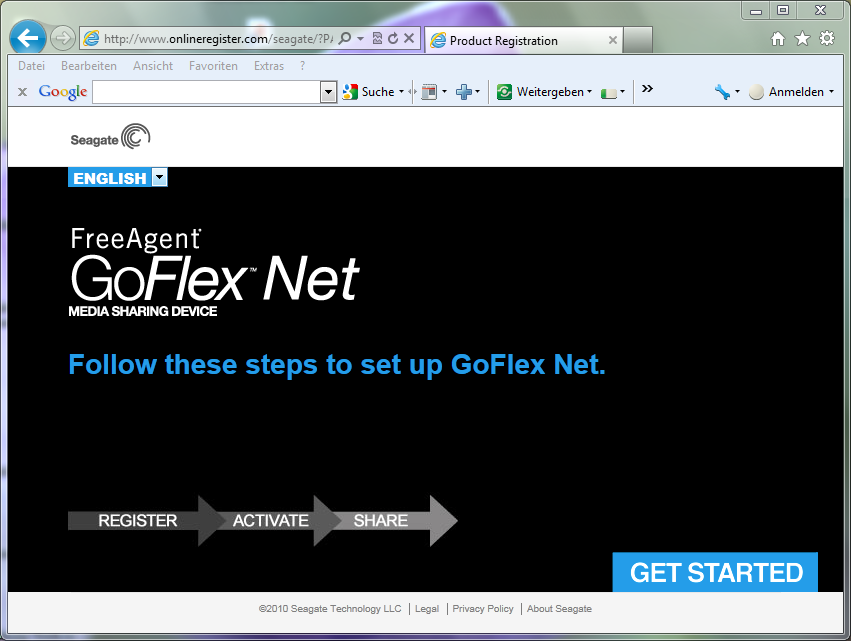
- Click on "Get Started"
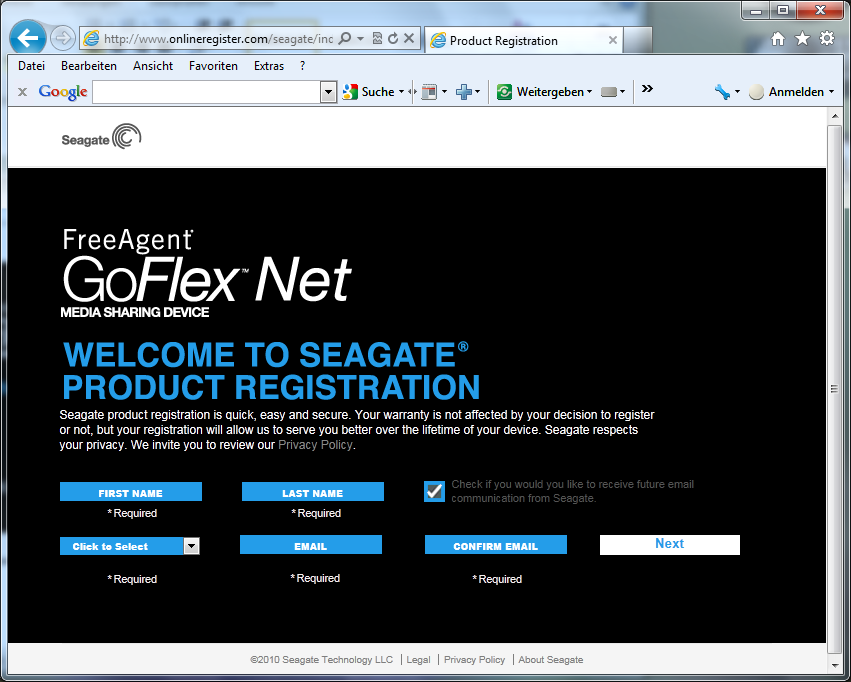
- Type in your personal information and click on "next"
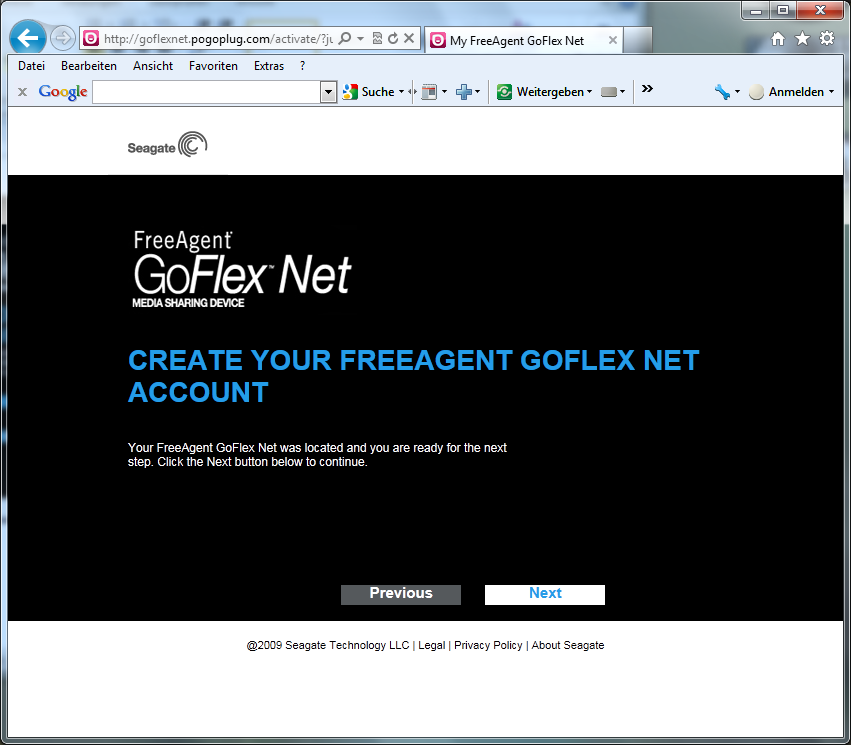
- Click on "next"
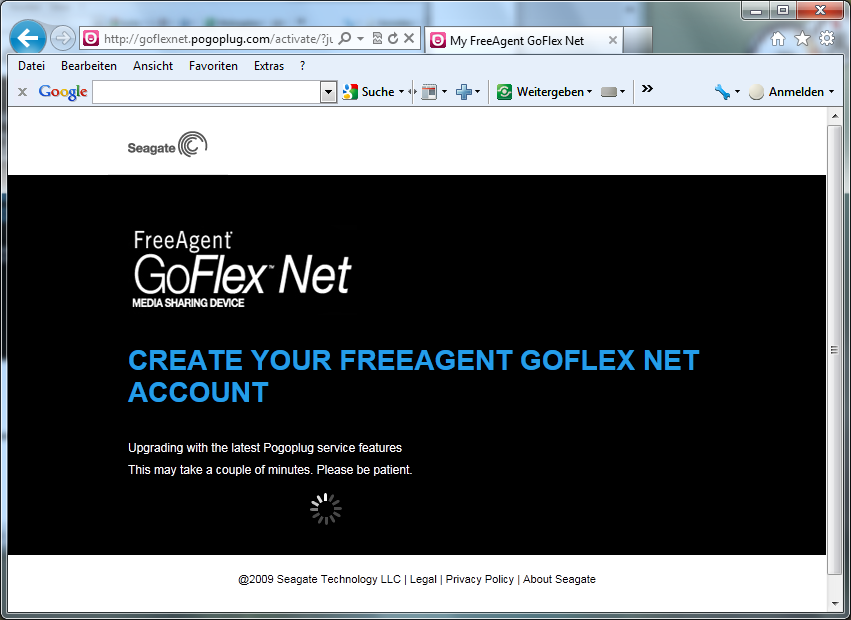
- The PogoPlug system will be updated, this takes some time
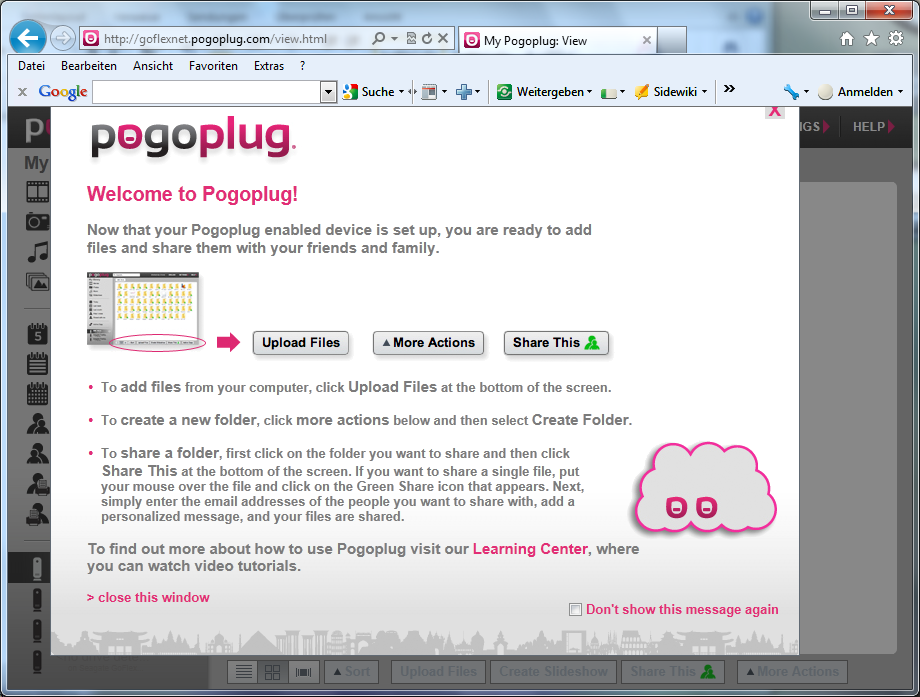
- close this pop up
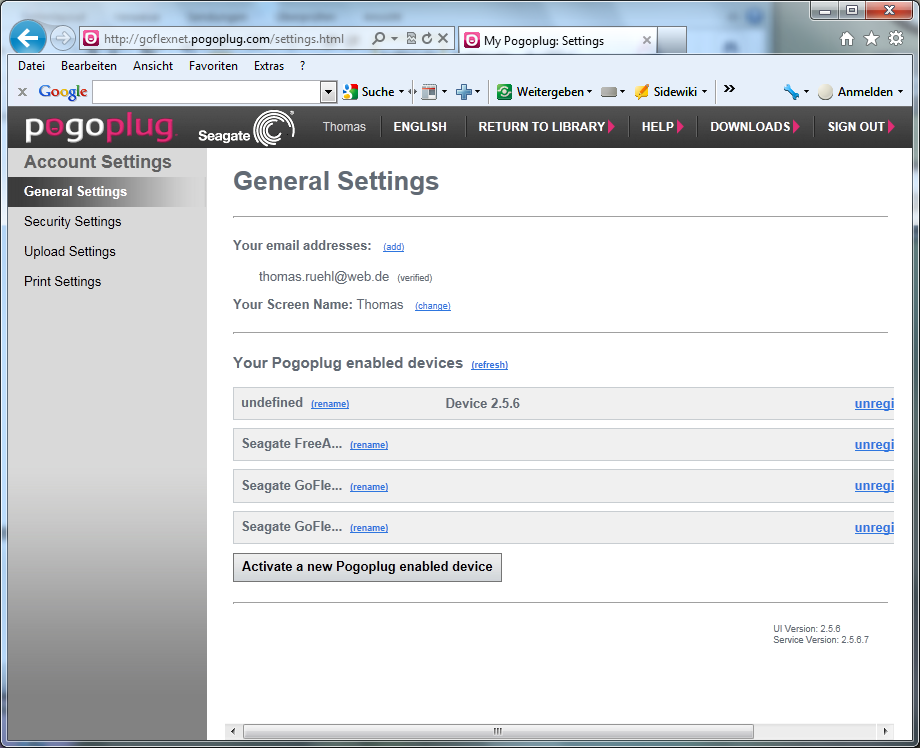
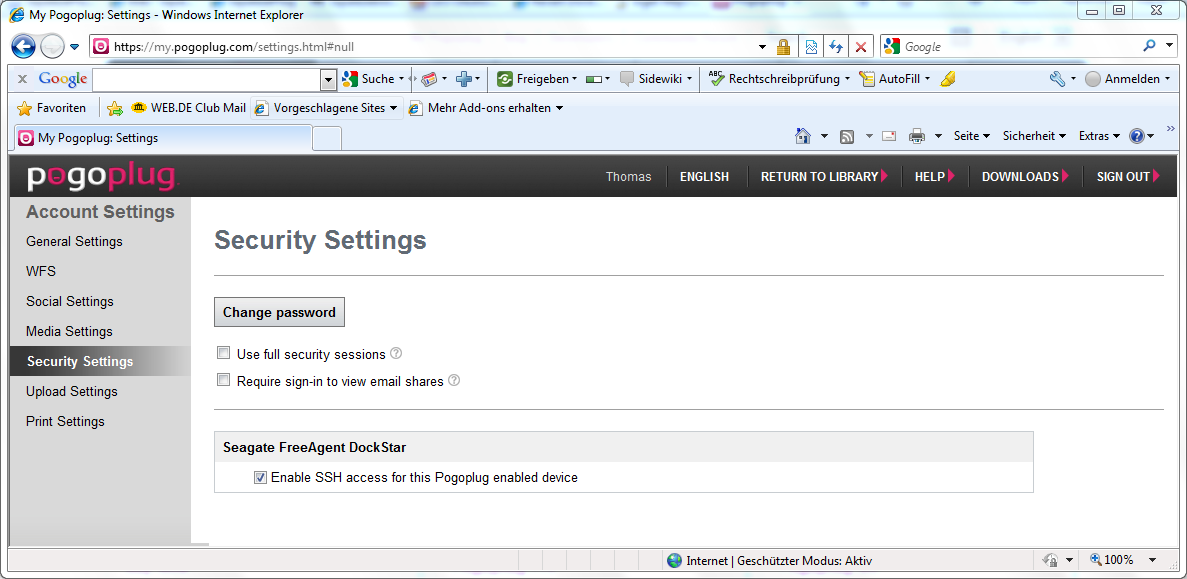
- Choose "Security Settings"
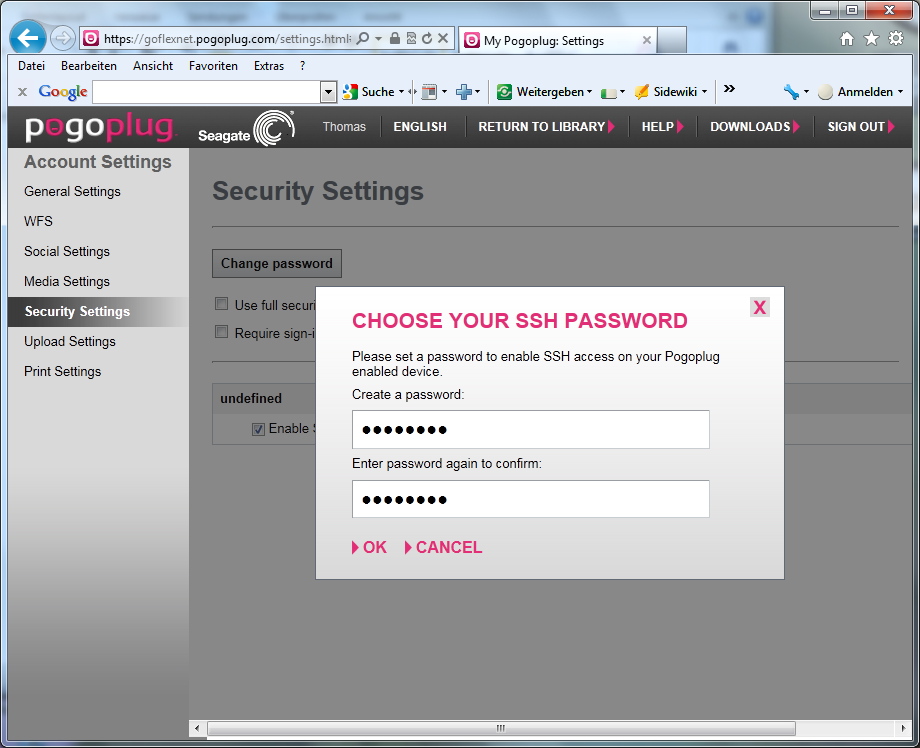
- Check "Enable SSH" and type in a password (you have to remember this)
Install the new bootloader
- Find out the IP-address of your GoFlex Net from your DHCP-server e.g. your router
- Open a SSH-Connection with this IP-address (via putty) and log-in with user "root" and your previous given password
- If you don't know how to do that go here: #Establishing an IP-connection
- So the prompt will read:
-bash-3.2#
- Stop the Pogoplug software, so it doesn't interfere with the install process
killall hbwd
- Install the bootloder to be able to boot SqueezePlug from a USB-stick:
cd /tmp
wget http://jeff.doozan.com/debian/uboot/install_uboot_mtd0.sh
chmod +x install_uboot_mtd0.sh
./install_uboot_mtd0.sh
- You will get the message:
If you agree, type 'ok' and press ENTER to continue:
- Type "ok"
- You will get the message:
Would you like to disable the pogoplug services? (Y/n)
- Type "Y"
- You will get the message:
 # You can set the correct arcNumber by running the following command:
 /usr/sbin/fw_setenv arcNumber 3089
 # UBoot installation has completed successfully.
- Run this command:
/usr/sbin/fw_setenv arcNumber 3089
- Shutdown the device
/sbin/halt
- Disconnect the device from power
- Plug in the previous build SqueezePlug USB-Stick
- Connect the device to power again
- Find out the new IP-address from your router.
- Connect via SSH to the IP-address you discovered on the router
- login with user "root" and password "nosoup4u"
- That's it, your SqueezePlug is running!
From now on you are only able to boot from USB. You can't boot into the PogoPlug system any more. And there is no way back to the old system. If you like a system on the internal NAND you can install the rescue system. That's a great system you can use for a lot of different things if something goes wrong with your USB-Stick.
Install the Rescue-System to NAND
To install this system on NAND do this:
- Boot from the USB-Stick and login
- Do the following commands:
root@squeezeplug:~#
cd /tmp
wget http://jeff.doozan.com/debian/rescue/install_rescue.sh
chmod +x install_rescue.sh
./install_rescue.sh
- You will get the following message:
If you agree, type 'ok' and press ENTER to continue:
- Type "ok"
- You will get the message:
# Rescue System installation has completed successfully.
root@squeezeplug:/tmp#
- Do this:
fw_setenv rescue_bootcmd 'if test $rescue_installed -eq 1; then run rescue_set_bootargs; nand read.e 0x500000 0x100000 0x400000; bootm 0x500000; else run pogo_bootcmd; fi'
- That's it, you can now boot SqueezePlug from USB or the Rescue-System from NAND (without the Stick)
root@squeezeplug:/tmp# reboot
- Login with the username "root" and the password "root" and you will get the following prompt:
rescue:~#
- Next Step for SqueezePlug_GoFlexNet_Image #Start the SqueezePlug Script
SqueezePlug_VM
If you are not sure whether a SheevaPlug will be good enough as your SqueezeBox-Server, you can download a virtual SqueezePlug (SqueezePlug_VM). The setup works exactly the same way as for a Hardware SheevaPlug. So you can even test whether you have enough knowledge to get it all to work! And you will see that you don’t need any special knowledge. If you like, you can run the SqueezePlug_VM Server as your SqueezeBox-Server as well, but you have to keep in mind that running it on a "normal" PC the Power-Consumption will be much higher than with a hardware SqueezePlug. The performance of SqueezePlug_VM normally is a little bit faster than the SqueezePlug. But you will only feel it when scanning the music-library. The performance in normal operating is quite the same.
If you like to get the real feeling of SqueezePlug you should run SqueezePlug_VM and connect to it via putty. Then you get exactly the same experience as working with a real plug. You can use the Wiki exactly the same way for a SqueezePlug_VM as for a normal Plug!
One very cool thing is: you are even able to get sound out of the SqueezePlug_VM. There are two ways to do that: one is already included in SqueezePlug_VM i.e. SqueezeSlave. The other one is SoftSqueeze, which you have to install on your host (or any other system in your network). Both possibilities are described later.
Have fun!
You should run SqueezePlug_VM in VirtualBox. I prefer VirtualBox because it's totally free, you don't have to register and it works on every processor, unlike the VMWare Player. For that reason I explain how to set it up in VirtualBox in detail.
- Download VirtualBox here: VirtualBox
- Install it
- Download the image for SqueezePlug_VM from my site: SqueezePlug
- Expand the archive
- Choose <file> <import appliance>
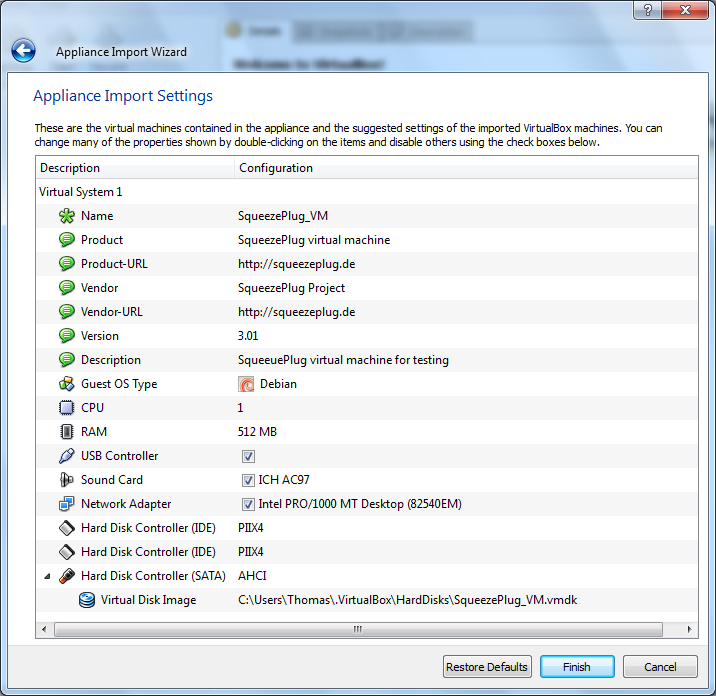
- After the import check the settings

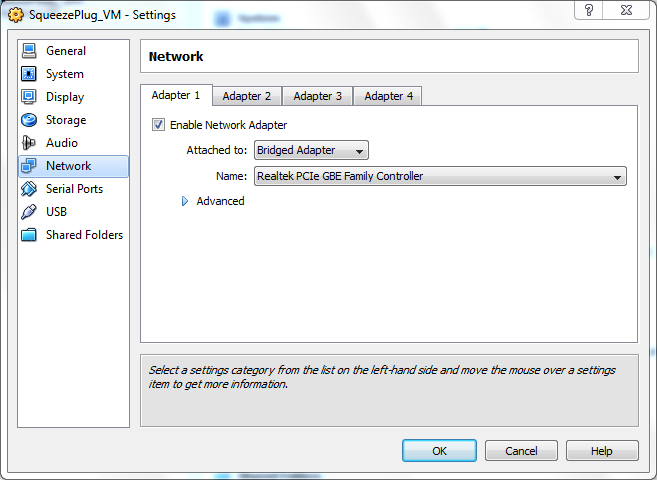
- Check the settings for your network-interface and change it to fit your environment
- Press start
- Login with user: root and Password: nosoup4u
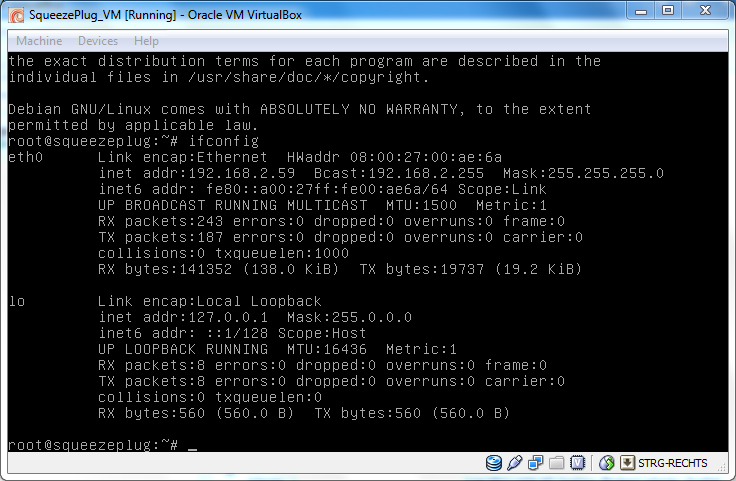
- get the ip-address of the VM
root@squeezeplug:~# ifconfig
- Connect to the VM via putty
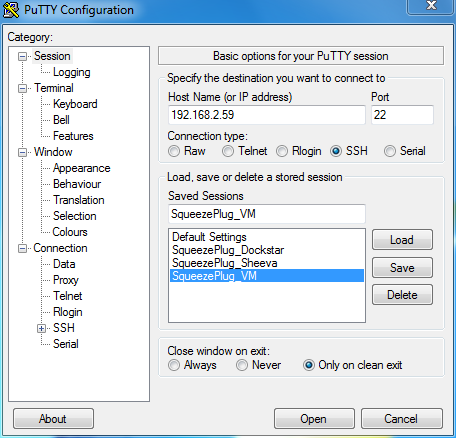
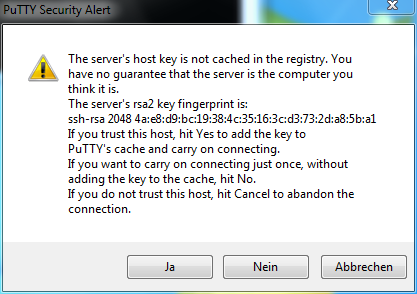
- Confirm the security message
Now you run your SqueezePlug_VM use it like a real hardware plug. If you feel it's good to work with, you will certianly like the SheevaPlug as well. You can even connect your music-library to the SqueezePlug_VM by USB or any other way described in this wiki.
- Now you can setup your system by starting the squeezeplug-configuration script:
- Optionally, you can install SqueezeSlave or SoftSqueeze
- SqueezeSlave
If you like to get sound-output directly from SqueezePlugVM you can do this by starting SqueezeSlave, a headless SqueezeBox-Player already installed on the SqueezePlug_VM.
- From the console just type:
squeezeplug:~# squeezeslave &
to start squeezeslave.
Now you should see the SqueezeSlave Player like any other SqueezeBox_Player on your network and you should hear sound if you play a song.
If that won't work, you should do this:
- Identify your working soundcard on the SqueezePlug:
squeezeplug:~# squeezeslave -L
The working soundcard is indicated with a "*"
- Start the alsamixer to configure your soundcard by typing:
squeezeplug:~# alsamixer
- Select your soundcard, power up all sliders and set them to OO by typing <M> like shown:
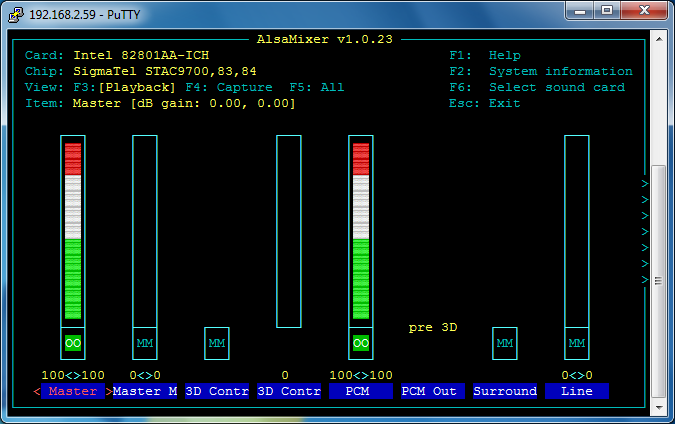
Now the sound should work!
- SoftSqueeze
And you can go one step further: Install SoftSqueeze on the host you run SqueezePlugVM, connect SoftSqueeze to your SqueezePlugVM and get the whole feeling of SqueezeBox! SoftSqueeze is Java and so it runs on every system. Setting it up is very easy, don't worry!
- Next Step for SqueezePlug_VM #Start the SqueezePlug Script
Start the SqueezePlug Script
The SqueezePlug Script configures your network settings, your filesharing connections, installs SBS automatically and does a lot more useful things. If you don't wish to use this script you can also do all necessary configuration steps by hand.
- Logon to SqueezePlug:
login as: root
pw: nosoup4u
- On your running system, start the SqueezePlug Config Script by typing:
squeezeplug:~# setup
- Standard settings
- You should follow the installation-points one after the other:
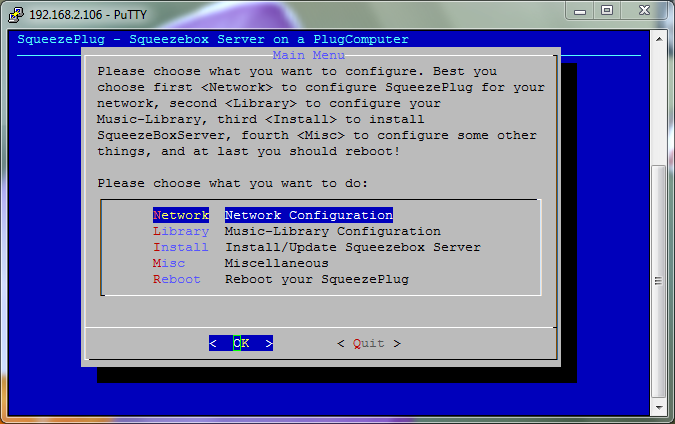
- Network: Configure your network settings and decide between dynamic IP by DHCP or a static IP-address. Type in all as asked
- Library: Configure the path to your music-library. You can use various options (USB/eSATA directly connected, Samba, NFS)
- Install: Installs SqueezeBox-Server on your plug.
- Misc: various options
- Reboot: reboots your plug
- HINT
- If you have problems pasting the download link in the SqueezePlug menu (I suggest you are using putty to connect to your SqueezePlug) try using <shift> + <right-click> on the input line!
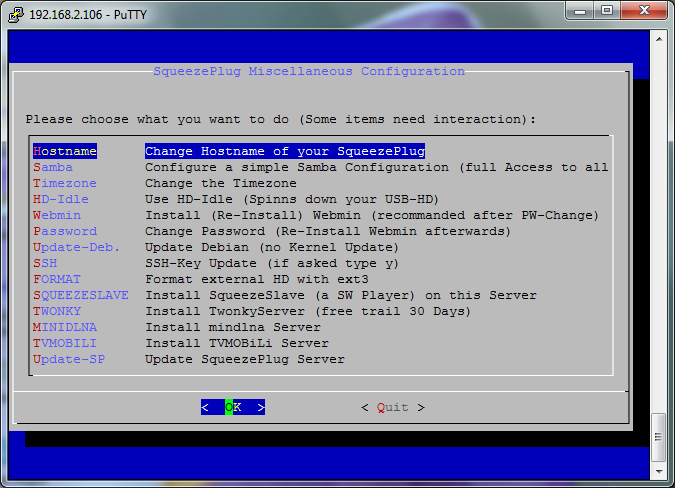
- Misc settings
You can choose various options from this menue, take a look:
- Next Step for SqueezePlug_Sheeva_Image (Multi-Boot Plug from NewIT) #Customize SqueezeBox-Server
- Next Step for SqueezePlug_Sheeva_Image (other SheevaPlugs) #Customize SqueezeBox-Server
- Next Step for SqueezePlug_Sheeva_Installer #Customize SqueezeBox-Server
- Next Step for SqueezePlug_Tonido_Image #Customize SqueezeBox-Server
- Next Step for SqueezePlug_Dockstar_Image #Customize SqueezeBox-Server
- Next Step for SqueezePlug_GoFlexNet_Image #Customize SqueezeBox-Server
- Next Step for SqueezePlug_VM #Customize SqueezeBox-Server
SqueezePlug_Sheeva_Manual
If you don't want to use one of my images you can go all the way by yourself. This method is based on the method of Martin Michlmayr. If you like, you can use the image from the SqueezePlugBase method and start right after the steps for installing the base Debian System.
Configure U-Boot for SqueezePlug_Sheeva_Manual
The following settings apply for all SheevaPlug models if you want to make a SqueezePlug_Sheeva_Manual installation.
- First save your environment settings by typing in the serial console (Putty):
Marvell>> printenv
You now get output with all your current environment settings.
- You should copy this to the clipboard by choosing "Copy all to clipboard" then paste this in a txt-file and save it. If something goes wrong, you are able to revert to these settings.
- From the serial console (Putty) type these commands, one after the other, and confirm after every line by hitting <return>. Copy each line to the clipboard (<ctrl> + <c> and paste this in the Putty window by clicking the right mouse button:
Marvell>> setenv mainlineLinux yes
Marvell>> setenv arcNumber 2097
Marvell>> setenv bootargs_console console=ttyS0,115200
Marvell>> setenv bootcmd_mmc 'mmcinit; mmcinit; ext2load mmc 0 0x01100000 /uInitrd; ext2load mmc 0 0x00800000 /uImage'
Marvell>> setenv bootcmd 'setenv bootargs $(bootargs_console); run bootcmd_mmc; bootm 0x00800000 0x01100000'
Marvell>> saveenv
If you want to restore the original settings, do the following:
- Look up the original settings from your saved environment variables for the variables you have changed.
It look like this for example:
mainlineLinux=yes.
- To reset the value type:
Marvell>> setenv mainlineLinux no
Marvell>> saveenv
Do this for each variable you have changed and don't forget the:
Marvell>> saveenv
at the end!
If this still doesn't work try the following:
- Reset u-boot to the factory-settings:
Marvell>> resetenv
Marvell>> reset
- After that, type in the variables as above again.
Prepare the system
- Format your sd-card with fat32 from your windows system.
- Copy the files uImage and uIntrd to your sd-card.
- Download the files here:
Attention: If you download the files with IE, the files get an .txt suffix: Delete this before copying the files to the sd-card.
- Boot your SheevaPlug and interrupt the boot-process by hitting <return> several times. If you are not quick enough, boot the linux-system from NAND and shut it down afterwards by typing:
login as: root
pw: nosoup4u
shutdown –r now
- Interrupt the booting-process again by hitting <return> several times.
- Type in the following commands:
Marvell>> mmcinit
Marvell>> fatload mmc 0:1 0x0800000 /uInitrd
Marvell>> fatload mmc 0:1 0x400000 /uImage
Marvell>> setenv bootargs console=ttyS0,115200n8 base-installer/initramfs-tools/driver-policy=most
Marvell>> bootm 0x400000 0x0800000
Setup Debian
- The bootstrap system starts and you can begin the installation of Debian.
The installation itself should be pretty standard. The installer knows about the SheevaPlug and will create a bootable kernel and ramdisk at the end of the installation.
- For the partitioning choose "guided partitioning"
If this won't work, do the partitioning of the sd-card manually and not automatically.
- Then: Erase the existing partitions and data and build new ones.
- All partitions are primary partitions.
- The essential parameters for the installation are:
- Partitions
- Partition: /boot; Size: 128 MB; file-system: ext2; Flag: boot
- Partition: Swap; Size: 256 MB; file-system: swap
- Partition: /; Size: Rest of space; file-system: ext3
Software Selection
- SSH server
- Standard system utilities
- Notebook
The steps above are from the the documentation here http://www.cyrius.com/debian/kirkwood/sheevaplug/install.html. If you want you can also read it there.
Special hint: By pressing <ctrl> + <c> you can copy the commands selected from the wiki to the clipboard. Then click the right mouse button to paste the commands to the putty terminal.
- Start the system and login:
login as: root
pw: nosoup4u
Install more packages
Now you should update your new system and install some more packages. If you think you don't need the package, just leave it:
- Update the system with the newest packages available:
squeezeplug:~# apt-get --yes update
squeezeplug:~# apt-get --yes upgrade
- Install ntfs-3g for connecting NTFS USB-drives to your SqueezePlug:
squeezeplug:~# apt-get --yes install ntfs-3g
- Install NFS for establishing NFS-Connections from your SqueezePlug like a NAS-Connection:
squeezeplug:~# apt-get --yes install nfs-common portmap
- Install a SAMBA-Client to connect your SqueezePlug to a SAMBA Share:
squeezeplug:~# apt-get --yes install smbfs
- Install ntpdate to get the correct time from the Internet:
squeezeplug:~# apt-get --yes install ntpdate
- Install file:
squeezeplug:~# apt-get --yes install file
- Install dialog
squeezeplug:~# apt-get --yes install dialog
- Clean up the system:
squeezeplug:~# apt-get --yes clean
Network Connection
The next step you should do from the serial console, because you change network settings. Restarting the network interface of your SheevaPlug during this causes the IP-connection to quit.
- Login to the system and configure your network settings:
squeezeplug login: root
Password: nosoup4u
squeezeplug:~# nano /etc/network/interfaces
- Change the file like this (depends on your network setup).
You can replace the whole text of the file by deleting the original text and paste the following text. Delete the "#" as you need it:
# This file describes the network interfaces available on your system
# and how to activate them.
#
# The loopback network interface
auto lo
iface lo inet loopback
#
# The primary network interface
allow-hotplug eth0
#
# Your settings start here:
#
# for DHCP use:
# iface eth0 inet dhcp
#
# for static IP use something like this (depends on your network setup):
# iface eth0 inet static
# address 192.168.2.102
# netmask 255.255.255.0
# network 192.168.2.0
# Broadcast 192.168.2.255
# gateway 192.168.2.1
#
# settings from the SqueezePlug script starts here:
- Write the file with <ctrl> + <o>, confirm the filename with <return> and quit nano with <ctrl> + <x>
- Shutdown and restart the network with the new settings:
squeezeplug:~# ifdown eth0
squeezeplug:~# ifup eth0
You now can choose between connecting via USB-Serial connection or network connection for the further steps. I suggest checking the interface settings first and then connect via network connection:
squeezeplug:~# ifconfig
- Proof the settings and if they are correct, make a new network connection (SSH) via putty.
Filesharing Connection
Your way to connect a music library depends on your personal environment. Options discussed in this wiki are:
- USB Fat/Fat32 drive -- see #USB Fat/Fat32 drive
- USB NTFS drive -- see #USB NTFS drive
- NFS Connection (normaly a NAS-Connection) -- see #NFS Connection
- Samba Client Connection -- see #Samba Client Connection
- If you like, you can setup more than one filesharing connection type.
- There may be other options. Please tell me or complete this wiki.
- For all types of file-share connections you need a mount point. For simplicity we create mount points for every type of connection:
squeezeplug:~# mkdir -p /mnt/nfs/music /mnt/samba/music /mnt/usb/music
- Edit the rc.local file for forcing the system to mount usb-drives on every start:
squeezeplug:~# nano /etc/rc.local
It should look like this:
#!/bin/sh -e
#
# rc.local
#
# This script is executed at the end of each multiuser runlevel.
# Make sure that the script will "exit 0" on success or any other
# value on error.
#
# In order to enable or disable this script just change the execution
# bits.
#
# By default this script does nothing.
mount -a
exit 0
USB Fat/Fat32 drive
- Plug the USB-drive in to your SqueezePlug.
- Find out the name of your USB-drive by typing:
squeezeplug:~# fdisk -l | grep FAT32
You now see the name of the USB-drive.
- Remember the name and edit the fstab-file:
squeezeplug:~# nano /etc/fstab
# /dev/sda1 /mnt/usb/music vfat rw,user,auto 0 0
- Delete the "#" and replace /dev/sda1 with your drive name.
- Write the file with <ctrl> + <o>, confirm the filename with <return> and quit nano with <ctrl> + <x>
- Mount all drives:
squeezeplug:~# mount -a
If you like to update files on the USB drive from a Workstation on your network, you can choose between dfferent possibilities:
- Configure a Samba Server -- look at #Install Samba Server.
- Use Secure Copy e.g. WinSCP
- Use FileZilla
- ...
USB NTFS drive
- Plug the USB-drive in to your SqueezePlug.
- Find out the name of your USB-drive by typing:
squeezeplug:~# fdisk -l | grep NTFS
You now see the name of the USB-drive.
- Remember the name and edit the fstab-file:
squeezeplug:~# nano /etc/fstab
# /dev/sda1 /mnt/usb/music ntfs-3g defaults,locale=en_US.utf8 0 0
- Delete the "#" and replace /dev/sda1 with your drive name.
- Write the file with <<ctrl>> + <<o>>, confirm the filename with <<return>> and quit nano with <<ctrl>> + <<x>>
- Mount all drives:
squeezeplug:~# mount -a
If you like to update files on the USB drive from a Workstation on your network, you can choose between dfferent possibilities:
- Configure a Samba Server -- look at #Install Samba Server.
- Use Secure Copy e.g. WinSCP
- Use FileZilla
- ...
NFS Connection
- Configure your NAS to accept connections from the SqueezePlug. Consult your NAS documentation.
squeezeplug:~# nano /etc/fstab
# 192.168.2.100:/raid/data/iTunes_music /mnt/nfs/music nfs defaults 0 0
- Delete the "#" and replace 192.168.2.100:/raid/data/iTunes_music with your connection data.
- Write the file with <ctrl> + <o>, confirm the filename with <return> and quit nano with <ctrl> + <x>
- Mount all drives:
squeezeplug:~# mount -a
Samba Client Connection
With these settings you get a connection from your SqueezePlug to a samba share. Use this if your music-library is stored on a samba server on your network.
- First make sure that your Samba-Share is working properly. It is in my opinion best to test with a client-system other than the SqueezePlug initially, just to make sure that the share is working. Set the user and the rights for your Samba-Connection and remember the values
- Edit /etc/fstab:
#//192.168.2.10/samba /mnt/samba/music smbfs username=<username>,password=<password>
- Delete the "#" and replace 192.168.2.10/samba and <username> and <password> with your connection data.
- Write the file with <ctrl> + <o>, confirm the filename with <return> and quit nano with <ctrl> + <x>
- Mount all drives:
squeezeplug:~# mount -a
Install Webmin
- Edit sources list for installing webmin:
squeezeplug:~# nano /etc/apt/sources.list
- Add the lines:
# webmin repository
deb http://download.webmin.com/download/repository sarge contrib
- Write the file with <ctrl> + <o>, confirm the filename with <return> and quit nano with <ctrl> + <x>
squeezeplug:~# cd /root
squeezeplug:~# wget http://www.webmin.com/jcameron-key.asc
squeezeplug:~# apt-key add jcameron-key.asc
squeezeplug:~# rm jcameron-key.asc
- You will now be able to install webmin:
squeezeplug:~# apt-get --yes update
squeezeplug:~# apt-get --yes install webmin
(this will take a while …)
Make a connection to webmin from a web browser:
- https:/<your ip address of SqueezePlug>:10000
- Login with user: root pw: nosoup4u (Ignore the missing certificate hint).
Change timezone and time
Do it from webmin:
- Hardware
- System Time
- set timezone
- set timeserver (for example: ptbtime1.ptb.de)
- System Time
Install Samba Server
If you want to get a connection to the USB drive directly connected to your SqueezePlug you best install a Samba Server on the SqueezePlug. You than will be able to connect to the USB drive by a file connection from your Windows Workstation. This is very useful to update files in the music library.
Setting up a Samba Server normally is a bit tricky. If you do this by webmin, it's pretty easy. This part of the Wiki assumes that you have installed webmin before.
- Be sure that you have plugged your usb drive and configured it, so that it is well mounted.
- Start a webmin session from your browser.
https://<your ip address of SqueezePlug>:10000
- Ignore the certificate warning
- Choose "Un-used Modules" from the left navigation
- Choose "Samba Windows File Sharing"
- Install the Samba Server
- After the Samba Server is installed, choose "Servers"
- Choose "Samba Windows File Sharing"
- Choose "Create a new file share"
- Give a name for the share: In "Share name" type maybe <music>
- Choose a directory to share: /mnt/usb/music and click "o.k."
- Click "create"
Now you should see the share in the list.
- Click on it
- Click on "Security and Access Control"
- Select "Guest Access?" "yes"
- Click on "Save"
- Click on "File Permissions"
- At "Force Unix user" select "root"
- Click on "Save"
The setting for the workgroup comes from the domain-name of the SqueezePlug. This name depends on your setup. If you use one of my images the name is set to "workgroup". Be sure to setup the workgroup name to the name of your local windows workgroup. If your windows workgroup has a different name than "workgroup" change the name by using webmin:
- Choose "Windows Networking" from "Global Configuration"
- At "Workgroup" type in the name of your workgroup
- At "Security" choose "Share level"
Now you are able to make a connection from your Windows Workstations to the USB drive connected to your SqueezePlug.
Install SqueezeBox-Server
- Download the latest version of Squeezebox-Server from here: SqueezeBox-Server Download
You can download the installation-package directly to your SqueezePlug and install SBS directly from the plug.
- Do the following:
- Create a directory for installation and download SBS
squeezeplug:~# cd /
squeezeplug:~# mkdir install
squeezeplug:~# cd install
squeezeplug:~# wget http://downloads.slimdevices.com/SqueezeboxServer_v7.5.1/squeezeboxserver_7.5.1_all.deb
squeezeplug:~# apt-get --yes update
squeezeplug:~# dpkg -i squeezeboxserver_7.5.1_all.deb
- Ignore any errors like this: “Errors were encountered while processing: squeezeboxserver”
squeezeplug:~# apt-get --yes --force-yes install -f
- Set the password for MySQL root: nosoup4u and repeat it
- If you want to free a little space on the SqueezePlug do this:
squeezeplug:~# apt-get --yes clean
Optimize SqueezePlug
This step is to optimize your SqueezePlug. You will renew the SSH-Keys of the Plug to get your personal and unique Keys and you will set the system up to reduce flash writings on the sd-card, so that it will live a little longer.
- Renew the SSH keys:
squeezeplug:~# ssh-keygen -q -f /etc/ssh/ssh_host_key -N '' -t rsa1
squeezeplug:~# ssh-keygen -f /etc/ssh/ssh_host_rsa_key -N '' -t rsa
- Type "y" when asked for overwriting existing keys
squeezeplug:~# ssh-keygen -f /etc/ssh/ssh_host_dsa_key -N '' -t dsa
- Type "y" when asked for overwriting existing keys
- Tuning Debian by reducing flash writing:
This is from http://www.plugcomputer.org/plugwiki/index.php/Reduce_Flash_Writes
squeezeplug:~# echo 0 >/proc/sys/vm/swappiness
squeezeplug:~# echo 5 > /proc/sys/vm/laptop_mode
squeezeplug:~# echo 1500 > /proc/sys/vm/dirty_writeback_centisecs
squeezeplug:~# echo 1500 > /proc/sys/vm/dirty_expire_centisecs
- To make the change permanent add a line to /etc/sysctl.conf:
squeezeplug:~# nano /etc/sysctl.conf
- add the lines:
vm.swappiness=0
vm.laptop_mode=5
vm.dirty_writeback_centisecs=1500
vm.dirty_expire_centisecs=1500
- Change /etc/fstab:
squeezeplug:~# nano /etc/fstab
- Add the line:
rootfs / rootfs relatime,rw 0 0
- Next Step for SqueezePlug_Sheeva_Manual #Customize SqueezeBox-Server
Customize SqueezeBox-Server
Some settings have to be made at the SqueezeBox-Server itself:
- Connect to your SBS by typing http://<IP of Your SqueezePlug>:9000 in your web browser.
- Put in your data for mysqueezebox.com.
- Configure the path to your music library and playlists.
- Stop scanning the database.
To show the correct artwork (especially for the Controller), the next step is very important.
- Store your artwork in the same folder as the songs. Store it as “folder.jpg” in every album folder.
Example:
- Williams, Robbie
- Reality Killed The Radio Star
- folder.jpg
- Reality Killed The Radio Star
- Type your path to your music library in “Advanced” “Artwork Folder”.
- Type %folder.jpg in “Advanced” “Artwork”.
- Make a complete scan of your database.
- Customize SBS as you like.
- Congratulations you have finished!!!
- Next Step for SqueezePlug_Sheeva_Image (Multi-Boot Plug from NewIT) #Update SqueezeBox-Server
- Next Step for SqueezePlug_Sheeva_Image (other SheevaPlugs) #Update SqueezeBox-Server
- Next Step for SqueezePlug_Sheeva_Installer #Update SqueezeBox-Server
- Next Step for SqueezePlug_Tonido_Image #Update SqueezeBox-Server
- Next Step for SqueezePlug_Dockstar_Image #Update SqueezeBox-Server
- Next Step for SqueezePlug_VM #Update SqueezeBox-Server
- Next Step for SqueezePlug_Sheeva_Manual #Update SqueezeBox-Server
Update SqueezeBox-Server
If you like to update your SqueezeBox-Server this can be accomplished very easily. You can do it manually by just installing a newer version over the old one or you can use my script. If you do it manually, you'll have to tune the SqueezeBox-Server again after installing. If you use the script it will be all done for you automatically!
- On Your running system start the SqueezePlug Script:
squeezeplug:~# setup
The rest is very easy, just follow the steps as described.
Appendix
Images
- You will find all images here
- SqueezePlug Images
What else will you need?
- Boostrap Files for Debian installation
- Squeezebox-Server
- U-boot Version 3.4.23
md5sum is 02ddee1875376ed2b28ffc0111472c9b
Version 3.4.23 is not the newest one but works fine. Some people reported problems with newer versions. NewIT uses this version.
- Tools
- Putty -- terminal-program for serial IP-connections to your SqueezePlug
- USB Image Tool -- tool for making the sd-cards from the images
- SDFormatter -- tool to format sd-cards
- TFTP-Server -- TFTP-Server to update the u-boot environmemt
- VirtualBox -- Virtulisation Software for SqueezePlugVM
- SoftSqueeze -- Software SqueezeBox Player
- MP3Tag -- very good tagging tool
- FLAC Frontend -- tool to make flac files
- Foobar -- tool I used to convert files mp4 -> flac
- universal-usb-installer -- Tool to install Linux on an USB-Stick
Useful links
- Marvell -- manufacturer of the ARM Processors
- Globalscales -- manufacturer of the SheevaPlug
- NewIT -- distributor of the SheevaPlug in Europe
- Debian on SheevaPlug -- Website describing how-to install Debian on SheevaPlug
- Update U-Boot -- Website describing updating U-boot
- plugcomputer.org -- Community site for plugcomputing
- Serial Connection to your Plug -- how-to make a serial connection to your SheevaPlug
- SheevaPlug Installer -- The SheevaPlug Installer to repair the SheevaPlug if something goes completly wrong
- Documentation of nano -- Documentation of nano, texteditor for Linux I prefer to use.
Known Bugs
- Bug in partitioning the sd-card if you install Debian "the long way". Workaround: Do the partitioning manually as described.
- Someone reported that the SBS Server starts in German. All the local settings are in English, I believe. I'm still searching for the bug! Workaround: change the language by going to Squeezeboxserver Settings, Basic Settings page, and selecting the language of your choice.
- Ignore the error message at boot time: "Setting kernel variables ...error: "net.ipv6.bindv6only" is an unknown key
failed." It's because you don't use IPv6.
Setenv commands for resetting Sheevaplug
Here are the setenv commands for resetting Sheevaplug.
Factory Settings
These settings are from the u-boot version 3.4.23, if you use an other version they might be different! You will get these settings if you do a resetenv from the Marvell prompt
autoload=no
baudrate=115200
bootargs=console=ttyS0,115200 mtdparts=nand_mtd:0x400000@0x100000(uImage),0x1fb00000@0x500000(rootfs) rw root=/dev/mtdblock1 rw ip=10.4.50.4:10.4.50.5:10.4.50.5:255.255.255.0:DB88FXX81:eth0:none
bootargs_end=:::DB88FXX81:eth0:none
bootargs_root=root=/dev/mtdblock2 ro
bootcmd=nand read.e 0x800000 0x100000 0x400000; bootm 0x800000
bootdelay=3
CASset=min
cesvcid=ULULULULULULPPULULULULULDA
console=console=ttyS0,115200
disaMvPnp=no
disL2Cache=no
disL2Prefetch=yes
enaAutoRecovery=yes
enaCpuStream=no
enaDCPref=yes
enaICPref=yes
enaMonExt=no
enaWrAllo=no
ethact=egiga0
ethaddr=00:50:43:xx:xx:xx
ethmtu=1500
ethprime=egiga0
image_name=uImage
ipaddr=10.10.0.1
loadaddr=0x02000000
loads_echo=0
mainlineLinux=no
MALLOC_len=1
mvNetConfig=mv_net_config=(00:11:88:0f:62:81,0:1:2:3),mtu=1500
mvPhoneConfig=mv_phone_config=dev0:fxs,dev1:fxs
nandEcc=1bit
netbsd_en=no
netmask=255.255.0.0
netretry=no
pexMode=RC
rcvrip=169.254.100.100
rootpath=/mnt/ARM_FS/
run_diag=no
sata_dma_mode=yes
serverip=10.10.0.2
setL2CacheWT=yes
standalone=fsload 0x2000000 $(image_name);setenv bootargs $(console) root=/dev/mtdblock0 rw ip=$(ipaddr):$(serverip)$(bootargs_end) $(mvPhoneConfig); bootm 0x2000000;
stderr=serial
stdin=serial
stdout=serial
usb0Mode=host
vxworks_en=no
yuk_ethaddr=00:00:00:EE:51:81
- Please note that you have to setup the ethaddr to your MAC-Address (look it up from the backside of the Plug).
NewIT Multi-Boot Option
These are the setting for the multi-boot option from NewIT:
arcNumber=2097
autoload=no
baudrate=115200
bootargs_console=console=ttyS0,115200
bootargs_end=:::DB88FXX81:eth0:none
bootargs_root_mmc=root=/dev/mmcblk0p2 rootdelay=5
bootargs_root_nand=ubi.mtd=1 root=ubi0:rootfs rootfstype=ubifs
bootargs_root=ubi.mtd=1 root=ubi0:rootfs rootfstype=ubifs
bootcmd_mmc=setenv bootargs $(bootargs_console) $(bootargs_root_mmc); mmcinit; ext2load mmc 0:1 0x800000 /uImage; bootm  0x00800000
bootcmd_nand=setenv bootargs $(bootargs_console) $(mtdpartitions) $(bootargs_root_nand); nand read.e 0x00800000  0x00100000 0x00400000; bootm 0x00800000
bootcmd=run bootcmd_mmc; run bootcmd_nand
bootdelay=3
CASset=min
console=console=ttyS0,115200 mtdparts=nand_mtd:0xc0000@0(uboot)ro,0x1ff00000@0x100000(root)
disaMvPnp=no
disL2Cache=no
disL2Prefetch=yes
enaAutoRecovery=yes
enaCpuStream=no
enaDCPref=yes
enaICPref=yes
enaMonExt=no
enaWrAllo=no
ethact=egiga0
ethaddr=00:50:43:01:xx:xx
ethmtu=1500
ethprime=egiga0
filesize=32D62A
image_name=uImage
ipaddr=10.4.50.165
loadaddr=0x02000000
loads_echo=0
mainlineLinux=yes
MALLOC_len=1
mtdpartitions=mtdparts=orion_nand:0x400000@0x100000(uImage),0x1fb00000@0x500000(rootfs)
mvNetConfig=mv_net_config=(00:11:88:0f:62:81,0:1:2:3),mtu=1500
mvPhoneConfig=mv_phone_config=dev0:fxs,dev1:fxs
nandEcc=1bit
nandEnvBase=a0000
netbsd_en=no
netmask=255.255.255.0
netretry=no
pcieTune=no
pexMode=RC
rcvrip=169.254.100.100
real_bootcmd=run bootcmd_mmc; run bootcmd_nand
recover1=setenv mainlineLinux yes; setenv arcNumber 2097; setenv bootcmd run recover2; saveenv; reset
recover2=run recover3; setenv bootcmd $(real_bootcmd); saveenv; setenv bootargs $(bootargs_console) $(mtdpartitions root=/dev/ram0 rw ramdisk=0x01100000,8M install_type=nand; bootm 0x00800000 0x01100000
recover3=run recover4; nand erase clean 0x00100000 0x00400000; nand write.e 0x00800000 0x00100000 0x00400000
recover4=usb start; fatload usb 0 0x00800000 uImage; fatload usb 0 0x01100000 initrd
rootpath=/mnt/ARM_FS/
sata_dma_mode=yes
serverip=10.4.50.5
setL2CacheWT=yes
standalone=fsload 0x2000000 $(image_name);setenv bootargs $(console) root=/dev/mtdblock0 rw ip=$(ipaddr):$(serverip)$(bootargs_end) $(mvPhoneConfig); bootm 0x2000000;
stderr=serial
stdin=serial
stdout=serial
usb0Mode=host
vxworks_en=no
yuk_ethaddr=00:00:00:EE:51:81
- Please note that you have to setup the ethaddr to your MAC-Address (look it up from the backside of the Plug).
- Restoring the multi-boot settings
If you wish to restore the settings for the multi-boot option do this: (Keep in mind, that you will need an UBIFS-NAND version to boot from NAND with this settings.)
- At the Marvell prompt type:
Marvell>> resetenv
Marvell>> reset
- After booting is completed type the following commands one after the other:
Marvell>> setenv arcNumber 2097
Marvell>> setenv bootargs_console console=ttyS0,115200
Marvell>> setenv bootargs_root_mmc root=/dev/mmcblk0p2 rootdelay=5
Marvell>> setenv bootargs_root_nand ubi.mtd=1 root=ubi0:rootfs rootfstype=ubifs
Marvell>> setenv bootargs_root ubi.mtd=1 root=ubi0:rootfs rootfstype=ubifs
Marvell>> setenv bootcmd_mmc 'setenv bootargs $(bootargs_console) $(bootargs_root_mmc); mmcinit; ext2load mmc 0:1 0x800000 /uImage; bootm 0x00800000'
Marvell>> setenv bootcmd_nand 'setenv bootargs $(bootargs_console) $(mtdpartitions) $(bootargs_root_nand); nand read.e 0x00800000 0x00100000 0x00400000; bootm 0x00800000'
Marvell>> setenv bootcmd 'run bootcmd_mmc; run bootcmd_nand'
Marvell>> setenv ethaddr 00:50:43:01:xx:xx
Marvell>> setenv filesize 32D62A
Marvell>> setenv mainlineLinux yes
Marvell>> setenv mtdpartitions mtdparts=orion_nand:0x400000@0x100000(uImage),0x1fb00000@0x500000(rootfs)
Marvell>> setenv real_bootcmd 'run bootcmd_mmc; run bootcmd_nand'
Marvell>> saveenv
- Please note that you have to setup the ethaddr to your MAC-Address (look it up from the backside of the Plug).
SD-Card Option
- These are the setting for the sd-card option from NewIT
arcNumber=2097
autoload=no
baudrate=115200
bootargs_console=console=ttyS0,115200
bootargs_end=:::DB88FXX81:eth0:none
bootargs_root=root=/dev/mmcblk0p2 rootdelay=5
bootcmd=setenv bootargs $(bootargs_console) $(bootargs_root); mmcinit; ext2load mmc 0:1 0x800000 /uImage; bootm 0x00800000
bootdelay=3
CASset=min
console=console=ttyS0,115200 mtdparts=nand_mtd:0xc0000@0(uboot)ro,0x1ff00000@0x100000(root)
disaMvPnp=no
disL2Cache=no
disL2Prefetch=yes
enaAutoRecovery=yes
enaCpuStream=no
enaDCPref=yes
enaICPref=yes
enaMonExt=no
enaWrAllo=no
ethact=egiga0
ethaddr=00:50:43:xx:xx:xx
ethmtu=1500
ethprime=egiga0
filesize=32D62A
image_name=uImage
ipaddr=10.4.50.165
loadaddr=0x02000000
loads_echo=0
mainlineLinux=yes
MALLOC_len=1
mvNetConfig=mv_net_config=(00:11:88:0f:62:81,0:1:2:3),mtu=1500
mvPhoneConfig=mv_phone_config=dev0:fxs,dev1:fxs
nandEcc=1bit
nandEnvBase=a0000
netbsd_en=no
netmask=255.255.255.0
netretry=no
pcieTune=no
pexMode=RC
rcvrip=169.254.100.100
real_bootcmd=setenv bootargs $(bootargs_console) $(bootargs_root); mmcinit; ext2load mmc 0:1 0x800000 /uImage; bootm 0x00800000
recover1=setenv mainlineLinux yes; setenv arcNumber 2097; setenv bootcmd run recover2; saveenv; reset
recover2=run recover3; setenv bootcmd $(real_bootcmd); saveenv; setenv bootargs $(bootargs_console) root=/dev/ram0 rw ramdisk=0x01100000,8M install_type=mmc; bootm 0x00800000 0x01100000
recover3=usb start; fatload usb 0 0x00800000 uImage; fatload usb 0 0x01100000 initrd
rootpath=/mnt/ARM_FS/
sata_dma_mode=yes
serverip=10.4.50.5
setL2CacheWT=yes
standalone=fsload 0x2000000 $(image_name);setenv bootargs $(console) root=/dev/mtdblock0 rw ip=$(ipaddr):$(serverip)$(bootargs_end) $(mvPhoneConfig); bootm 0x2000000;
stderr=serial
stdin=serial
stdout=serial
usb0Mode=host
vxworks_en=no
yuk_ethaddr=00:00:00:EE:51:81
- Please note that you have to setup the ethaddr to your MAC-Address (look it up from the backside of the Plug).
- Restoring the sd-card settings
If you wish to restore the settings for the sd-card option do this:
- At the Marvell prompt type:
Marvell>> resetenv
Marvell>> reset
- After booting is completed type the following commands one after the other:
Marvell>> setenv arcNumber 2097
Marvell>> setenv bootargs_console console=ttyS0,115200
Marvell>> setenv bootargs_root root=/dev/mmcblk0p2 rootdelay=5
Marvell>> setenv bootcmd 'setenv bootargs $(bootargs_console) $(bootargs_root); mmcinit; ext2load mmc 0:1 0x800000 /uImage; bootm 0x00800000'
Marvell>> setenv ethaddr=00:50:43:xx:xx:xx
Marvell>> setenv filesize 32D62A
Marvell>> setenv mainlineLinux=yes
Marvell>> setenv 'real_bootcmd=setenv bootargs $(bootargs_console) $(bootargs_root); mmcinit; ext2load mmc 0:1 0x800000 /uImage; bootm 0x00800000'
Marvell>> saveenv
- Please note that you have to setup the ethaddr to your MAC-Address (look it up from the backside of the Plug).
Building Images
This is just for me, to remember what to do if making images. You will not need it at all:
- Set the interface to DHCP
squeezeplug:~# nano /etc/network/interfaces
- Delete the files:
squeezeplug:~# rm /etc/udev/rules.d/*
squeezeplug:~# rm /lib/udev/write_net_rules
* add "mount -a" before exit 0
nano /etc/rc.local
- copy the scrips and make the executetable
- make a logical link to setup
- Delete some packages
squeezeplug:~# apt-get remove exim4 exim4-base exim4-config exim4-daemon-light
- Update the system
squeezeplug:~# apt-get --yes update
squeezeplug:~# apt-get --yes upgrade
squeezeplug:~# apt-get clean
squeezeplug:~# history -c
squeezeplug:~# cd /root
squeezeplug:~# rm .bash_history
Install squeezeslave on SqueezePlugVM
copy squeezeslave to /usr/bin
chmod 777 squeezeslave
squeezeplug:~# apt-get install alsa
squeezeplug:~# apt-get install subversion
squeezeplug:~# apt-get install libasound2-dev
squeezeplug:~# apt-get install libncurses5-dev
squeezeplug:~# apt-get install liblircclient-dev
squeezeplug:~# squeezeslave &
Last edited:
--Truehl 14:34, 22 September 2011 (PDT)